
Happy Saturday, Crafty Friends!
Today is the release of Spellbinders Stitched Alphabet dies and Stitched Alphabet Descriptors Sentiment stamp. If you are new to stitching on paper, like me, this video is excellent (HERE). I created a bold sentiment with the new dies and then used the Stitched Alphabet Descriptors to tie it together.

To create my card, I first cut a piece of white cardstock down to a mini slimline 3x6 inch panel. I then inked the panel using a mix of rainbow ink colors that coordinated with my color palette. I was a little nervous stitching on paper; however, it was easy to do and wonderfully relaxing after watching the Spellbinder's tutorial. To make sure that the stitching would not rip the paper, I die-cut each letter twice and glued the diecut pieces together. This provided extra support, especially when working the letter "m" where the diecut was susceptible to creasing along the connector points. After stitching on the cardstock, I arranged the letters to spell out the word Smile and added the heat embossed sentiment "You have that x-factor" onto black cardstock for a finishing touch.

Thank you for stopping by and spending a bit of time with me. I hope you have a chance to visit the new May Release from Spellbinders (HERE) and create a little paper magic of your own!
Create Beauty Every Day!
Keia


Hello, Crafty Friends!
Friday is here! And you know what that means...a chance to get crafty this weekend! I enjoy waking up on a Saturday morning and just stepping into my creative space for a chance to play with my supplies, organizing does count 😁, trying out a new technique, or just taking a moment to soak it all in a quiet and creative space.
This week, I thought I would try my hand at playing with Scrapbook.com's new Brooklyn Upper Case Alphabet stamp set paired with the Slimline Strips.

Usually, I do not design cards with an alphabet stamp set. I feel comfortable using alphabet dies, but I wanted to create outside my comfort zone. I started myself out in this new endeavor by creating a background with a sentiment on top. Simple, I know, but still a step in a new direction. I stamped each uppercase letter in Pinkfresh Studio's Rocky Slope dye ink. Once this was complete, I diecut the sentiment "Hello You" from white cardstock and the Boho cardstock pack, a favorite color palette of mine. I like to add dimension to my letters, so I diecut each of the letters three times. I wanted to create some visual interest, the top layer for each letter uses the strips from the new Slimline Strips die. The "You" from the Thinking of You die set completes this fun, graphic card.
.JPG)
I hope this card has inspired you to step into your creative space and think of new ways to use alphabet stamps in your card/layout designs.
Create something beautiful...
Keia
Card Supplies:





Hello, sweet friends!
I hope your week is off to a great start. This week is a busy one for me, but I am hoping to have a day date with my husband this week. Fingers crossed. I had a chance to step into my craft room over the weekend, and I really enjoyed playing with a few paints/reinkers and other crafty goodies.
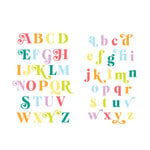
Today's card features Scrapbook.com's new Festive Alpha die set and the Be Creative set by Colorada Company.
To create this card, I started by using the Inspire die to create a tone-on-tone background. I love the way the stacked dies add visual interest to what would have been a plain card front otherwise. I used various Scrapbook.com smooth cardstock pads Warms, Roses, Florals, and my favorite...Boho, to diecut the word "Create." The cute little mouse was stamped onto Copic-friendly paper and colored with Copic markers and colored pencils. A simple sentiment from the stamp set is heat embossed onto black cardstock with white embossing powder.

Thank you for spending a bit of time with me this morning. I hope you have a wonderful week and a chance to create something beautiful.
Create Everyday,
Keia
Card Supplies:



Hello Friends,
As a nation, I am saddened by the state we find ourselves in. And the reality is that it will take us time to heal. Right now, I do not have the words to express all the emotions that I am feeling. However, I find myself seeking a moment of quiet for reflection and pondering how to move forward.
Today, I am sharing a card I made offering a "Paper Hug." I think we could use one right about now.

Making this card is a great way to use those scraps of paper we have in our craft rooms that we cannot let go of but are taking up precious real estate. To create this card, I took a piece of Sugar Cube cardstock and covered it with strips of Guava, Pink Champagne, Cookie Monster, and Pablano cardstock. I then Used the Collegiate Letters to diecut the word "Hug" from the panel. Using a We 'R Memory Keeps geometric 3D embossing folder, I added a little visual interest to the background panel. A heat embossed sentiment on vellum and a few paper airplanes complete this card.

There is a lot of work that needs to be done in the days and months ahead. Remember to pace yourself. Self-care is important, so set time limits for screen time, rest, listen, and lean into your communities. I am sending hugs to all my friends in the crafting community.
Hugs,
Keia
Card Supplies:
Cardstock: TE (Guava, Pink Champagne, Cookie, Pablano, vellum)
Dies: Diamond Press (Collegiate Letters)
Stamps: Lawn Fawn (Sending Letters), Diamond Press (Flower Garden)
Accessories: Copic Markers, VersaMark, black embossing powder,

Hello friends,
Today, I am popping in with a quick and fun card using Diamond Press's Collegiate Letters.

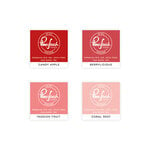
I don't know about you, but I seem to be collecting alphabet dies like they are the next big crafty thing. I have them in a range of sizes and fonts, which can make for endless creative possibilities. I like the bold look of the Collegiate Letters, and the die is large enough to really be the focal point on a card. This card is actually a 5x7. To create this card, I first started by using Concord and 9th's Pained Shapes stamp set and inking this abstract heart with Berrylicious, Passion Fruit, and Coral Reef dye inks from Pinkfresh Studio. I used the tiny brushstrokes stamp and heat embossed the image with gold embossing powder. Once I had my panel the way I wanted, I used the L, O, V, E dies, and diecut each from the inked panel. I then went back and diecut each of the letters twice to add dimension to the card panel. I inserted the letters back into the card panel to complete the eclipsed look. A simple "you" diecut from black and gold glitter cardstock is affixed to the center, and this card is a wrap!

Thank you for stopping by! I hope you have a chance to step into your craft room and create a little paper magic this week.
Happy Crafting,
Keia
Supplies:
Cardstock: TE (Sugar Cube)
Dies: Diamond Press on HSN (Collegiate Letters)



Social Icons