
Happy Valentine's Day, Crafty Friends!
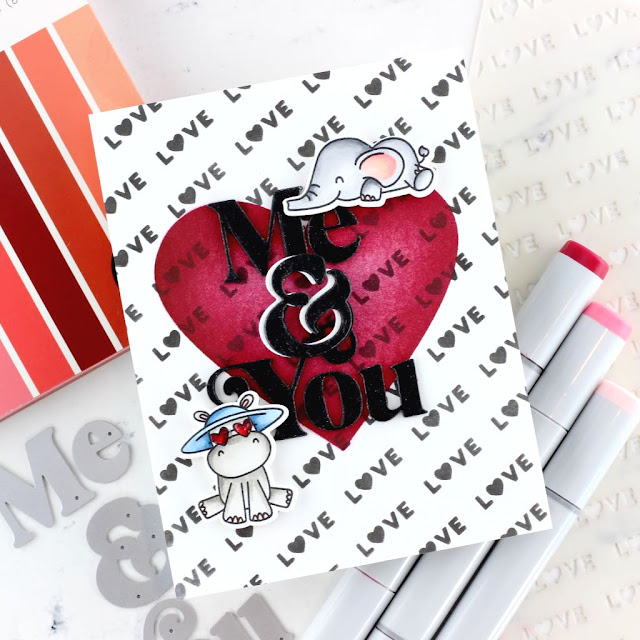
The "day of love" snuck up on me with a quickness! Good thing I have been turning out a few love notes here and there. Last week, I received a few goodies from Scrapbook.com and it was filled with the cutest love-themed stamps and stencils. I made time to play with the new Love stencil and the cute critters from Avery Elle's Island Time. I feel like I should take a triumphant heart-shaped lap for being on time with a card...hold my supplies for me.
I love when a crafting session pushes me to pair items in unexpected ways. I purchased the Island Time stamp and die set last summer and never had a chance to use it. I hope you understand that purchasing craft supplies is its own hobby, right? At least that is what I tell myself. The critters are so adorable, and I imagined the set can be used for other occasions outside of a sunny, island scene.
With supplies in hand, it was time to start creating my card. Using a white, A2 panel I inked the stencil using black ink. I then used a masking stencil to add the heart using varying shades of red. The Festive Alpha die set is perfect for creating my own sentiments. I diecut the letters three times each using black cardstock, and for the final layer added black glitter cardstock for a little sparkle. The ampersand has an additional white shadow layer for a little pop. The Copic-colored critters complete this cute card. I consider this a wrap.
Thank you for spending a portion of your day with me. I hope you have a wonderful day doing what brings joy to your heart. Sending Hugs...
Remember to create...
Keia
Card Supplies:






Happy December, Pinkfresh Studio Friends!
The holidays are upon us! I cannot believe we have 19 days until Christmas! So if you are like me, there are a few more Christmas cards to be made and sent to loved ones. This month's Pinkfresh Studio Challenge is all about the holidays...a perfect challenge to get us in the mood for a contemporary color palette, festive die, pattern paper, and a dash of inky splatters and sparkle.

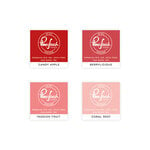
Okay, this color palette is right up my alley. If you are looking for a fresh take on a Christmas color palette, this one is for you. I love the use of the teal family and shades of red for a softer, elegant Christmas look. And like every crafter, it is fun to reimagine stamps and dies in new ways. For example, I am using the Joyful Peonies stamp and die for my card's Christmas floral, paired with the Blanket Stitched Oval as a stenciled background. I love shapes and how they add a new dimension to any card design. To create this simple oval mask, I cut a piece and copy paper to 4.25 x 5.5. I then die-cut the oval in the center of the panel and adhered it to a white A2 card base using repositionable tape. I inked the panel using Tidal Pool, Mermaid Cove, Aquamarine, and Ocean Breeze. Once inked, I peeled off the homemade mask and voila! The bouquet image was stamped using Detail Black ink and colored with Copic markers. I also, stamped the image again onto the inked panel using the lighter Rocky Slope dye ink as a shadow. A few white inky splatters for snow and a Christmas sentiment from the Perfect Sentiment: Holiday stamp set completes this card.

Thank you for spending time with me. I hope this month's challenge inspires you to create something magical with the stamps, dies, and ephemera in your crafty stash. And as with each challenge, Pinkfresh Studio is looking to spread the love. Create a beautiful holiday card or project using the theme, color palette, or both for a chance to win a $50 gift card to Pinkfresh Studio's online store. Link your card HERE.
Happy Holidays,
Keia



Hello, Crafty Friends!
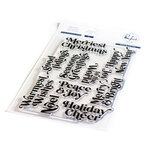
Today I am popping in to share a card featuring Pinkfresh Studio's Floral Notes stamp, stencil, and coordinating die. The card is inspired by Pinkfresh Studio's August 2020 Challenge...Florals. Honestly, I have had my eye on the Floral Notes stamp set for a while and I was excited to finally break it out of my stash pile to play with it. Please tell me I am not the only one who collects stamps for some playtime in the future, right? Wink. Wink.


Lately, I have been seeing this amazing mix of black and white paired with bold color and I am loving the juxtaposition between the two color groups. I wanted to play with this concept, but with one addition, I am all about framing. However, I didn't want to necessarily add a physical frame to my card project. Been there and done that this week. My design was to use a rectangle die to create a mask for the area I wanted to frame-out. This is the perfect time to have your craft shape dies do extra duty by creating masks. I created my mask using acetate for longevity; however, in a pinch, I have used paper. Remember to save both the positive and negative for later use. The Essentials Stitched Rectangles had the right-sized rectangle for this card.

Once my mask was complete, I stamped the Floral Notes image in Detail Black ink onto a white, A2 top-folding card base. I then used the rectangular mask to create the base for my focal point. I inked the area using Emerald City dye ink. I was mindful to concentrate the color toward the bottom of the card and then let the color fade as I moved to the top of the card. I few inky splatters add another layer of interest.

The Floral Notes set is perfect for a slimline card; however, do not let the size of the stamp fool you into thinking it cannot be used on smaller card projects. I used the layering stencils to create the look of a no-line colored floral bouquet using Meadow, Sparkle Rose, Raspberry Bliss, Bubble Gum, and Ballet Slipper dye inks. Once finished, I fussy cut various pieces of the bouquet into manageable shapes for my card front. Using my favorite crafty product, foam adhesive, I went about layering the diecuts. A stamped sentiment and a few pale pink jewels complete this card. I just love how it turned out!
I hope this card has inspired you to step into your craft space and play with colors to create a little paper magic. There is still time to participate in Pinkfresh Studio's January Challenge...A Year in Review. And challenge participants have a chance to win a $50 gift card to Pinkfresh Studio's online shop. For more details, visit the Pinkfresh Studio Challenge (HERE). Thank you for stopping by!
Happy Crafting,
Keia

Happy Tuesday, Crafty Friends!
Today, I am sharing cards using Diamond Press's Lovely Floral cover plates. This collection features four floral cover plates and is perfect for making quick, elegant cards. Or, pair the cover plates with one of your favorite techniques to take your cardmaking to the next level.

For this card, I used masking stencils to create a twilight effect using dye inks in beautiful shades of deep purple, blue, orange, and pink. I diecut the silhouette image three times to add dimension without having to use foam adhesive on the delicate stems. A simple heat embossed sentiment completes this card.

Another fun technique is to use alcohol inks to create an organic background for your diecut.

Using alcohol inks creates a sense of movement. When using alcohol inks, be sure to work in a well-ventilated area. I like to use Tim Holtz's Alcohol Ink Blower to move the alcohol inks around on my yupo paper. To create this card, I used some of my favorite colors Sunset Orange, Lettuce, and Sunshine Yellow. A simple sentiment diecut from gold mirrored cardstock adds the finishing touch.

I hope these projects have inspired you to try a few new techniques with your cover plates. Thank you for stopping by.
Happy Crafting!
Keia

Hello Friends,
I am back again with a quick card using the new Zebra stencil from Scrapbook.com. I will write, I use to be hesitant to use stencils. I often found them intimidating. However as I have grown as a cardmaker, I find myself drawn to the impact a simple stenciled pattern can have on my card designs.

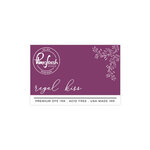
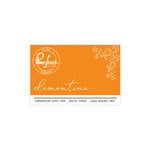
To create this card, I started by masking off a large circle to create a backdrop for my majestic tree. I inked the masked area using Taylored Expressions blending brushes with Peach Fuzz and Clementine dye inks. I then used Altenews layered stamp set, In My Thoughts, to stamp the tree layers onto Sugar Cube cardstock. Next, I covered the area and laid the zebra stencil onto the inked A2 card panel. I loved the idea of using a desert color palette to complement the zebra pattern. Starting from the bottom, I used Toffee, Spearmint, Regal Kiss, and Raspberry Sorbet dye inks to achieve the desired effect. A simple sentiment completes this card.

I hope you have a chance to use your stencils to make something beautiful. Thank you for stopping by.
Happy Crafting,
Keia
Card Supplies:



Hello My Favorite Peeps!
I have been seeing the technique abstract inking all over Instagram, and I just had to give it a try. Now, the technique does work best with mini ink cubes, but low and behold I have very few of those in my crafty stash. I am thinking maybe Santa needs to put a set or two into my stocking this year. (I am looking at you, hubby).


Social Icons