
Monday, March 28, 2022
Pinkfresh Studio March Release Blog Hop| Washi, Stamp, Die, Stencil and Hot Foil Stamp
Hello, Sweet Friends!!
Welcome to Pinkfresh Studio's March Release! Over the course of the past week, little sneak peeks have been popping up on Instagram and now the big day is here. There is so much to love whether you love beautiful floral washi tape designs or geometric dies, there is something for everyone to enjoy with this release. You know where my creative heart gravitates toward...geometric shapes. Let's go!


My first card features the AMAZING Hibiscus collection paired with the Nested Diamonds Hot Foil Stamp. I warned you the geometric shapes would be fantastic. To create this card, I started by adhering the hibiscus washi tape to a 4.25x5.5 piece of white cardstock and then diecutting this using the coordinating dies. The Nested Diamonds dies were used to create a focal point on the righthand side of an A2 card panel. I then inked this area using various shades of orange. To create the gold matte diamond borders, I used the coordinating Nested Diamond Hot Foil stamp and the dies to die cut my pieces. Once I had my pieces, it was time to assemble my card. I added a sentiment and gold inky splatters to the card front and nestled the hibiscus bouquet among the diamond-shaped cutouts. A Copic-colored butterfly in shades of orange and purple completes this card.

My second card pairs together the Fuschia collection and Nested Hexagon dies.

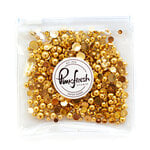
I enjoy finding new ways to use my dies, and this card is no exception. Using shape dies to create an interesting background for the hanging fuchsia florals is a great way to utilize a craft room staple. I diecut the A2 panel once I had created my geometric background with the dies. I wanted to add a little visual interest before layering the top panel with fuchsia flowers, so I stamped the largest image from the set onto another A2 panel. I then used foam tape adhesive to add the top panel. Once adhered the top panel, I arranged the floral pieces among the hexagon cutouts. A simple sentiment, Copic-colored butterfly, and matte gold pearls complete this card.

Thank you for spending time with me. I hope these cards have inspired you to use geometric dies in new and unexpected ways. Hop along with the Pinkfresh Studio Creative Team and guest designers for more inspiration.
And as with every release, Pinkfresh Studio is looking to share the love. Pinkfresh Studio will gift one lucky creative with the ENTIRE March release. Individuals will be chosen from Pinkfresh Studio's Blog (HERE) and YouTube Page (HERE). In addition, ten (10) creatives will have a chance to win a $25 gift card to Pinkfresh Studio's online store. To be eligible, leave a comment along the Blog Hop for a chance to win. Winners will be chosen from the comments and posted on Pinkfresh Studio's Winners Page (HERE) on April 5th.


Hello, Crafty Friends!
I hope you are having an amazing holiday season. This year is quickly drawing to a close; however, there is always time to create. I managed to sneak in a little crafty time between the Christmas movies, gift wrapping paper, and yes, birthday gifts (my eldest is a December baby). Up next, thank you cards...
Okay, it only took a few months, but I think I am beginning to get the hang of this hot foil stamping thing. I will not lie, hot foil stamping had me creative stumped. But after tears of frustration, YouTube videos, and reaching out to my creative peeps, I am feeling a little more sure-footed. Hot foil stamping is really ALL ABOUT THE PAPER. I have found that 110lb cardstock along with a paper shim (110lb folded in half) works best for my foiling system. Finally, I am able to achieve the correct amount of pressure with my foiling system. YES!!!!!!
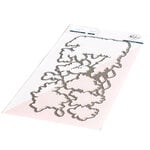
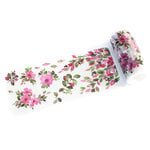
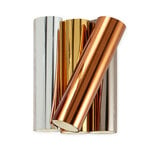
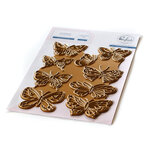
To create this card, I started by foiling two A2 panels using the new Heart Grid hot foil stamp and Gunmetal foil. I then cut these panels, using my trimmer, to create two foiled triangles. I layered these onto another white A2 card base. However, before adhering the triangles, I positioned them on the card base and stamped my sentiment. Once I stamped the sentiment, I adhered the triangles using foam adhesive. Next, I layered the beautiful washi tape florals and added, dare I write, I foiled butterfly. I was on a foiling roll. 😁 A few leaves blowing in the wind complete this card.

Thank you for spending a portion of your day with me! Sending love, light, and creative vibes your way!
Keia
Card Supplies




Happy Tuesday, Crafty Friends!
Okay, the Pinkfresh Studio September Release is in full and effect and I am still drooling over the release of the hot foil stamps. Be still my heart over all that geometric AWESOMENESS!


What is there not to love about this hot foil stamp!!!! To create this card, I started by inking a white 110lb card panel with Passion Fruit, Berrylicious, and Candy Apple dye inks. I set the panel aside to dry and prepared to heat my Go Press and Foil system. Once the panel was dry, I used gold foil to foil the panel and a white cardstock panel. I used a shape die to diecut a curved angle and then matched the two paneled patterns together. The Poinsettia Collection (washi, stamp, die, and stencil) are perfect for adding a beautiful, festive bouquet to the geometric panel. A heat embossed sentiment, gold metallic pearls, and glittery gold leaves complete this card.

Thank you for stopping by. Head on over to Pinkfresh Studio's Instagram page for a complete listing of designers and more creative inspiration along the Instagram Hop. And while you are there, leave a comment on each post for a chance to win a $25 gift card to Pinkfresh Studio's online store.


Good morning, Crafty Friends!
The month of August is quickly coming to a close; however, there is still a little time left to participate in the August Challenge| Stripes. As always, creatives can use the theme, color palette, or both as a starting point. Either way, we hope you are inspired and join us for this month's challenge, which ends on August 31st.


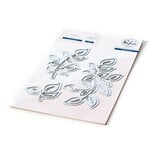
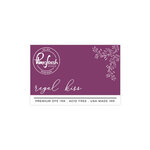
Okay, let me be honest, it would have never occurred to me to pair together the colors from this month's color palette. However, I am blown away at how well these colors play off one another. And by using the colors in a geometric design the colors really pop. So this is a color palette that I will be keeping in my list of go-to's. To create this card, I started by stamping the Nested Diamonds, at an angle, onto white cardstock using the Regal Kiss, Candy Apple, Ballet Slipper, and Olive dye inks. I set the panel to the side to dry because the red ink has a tendency to smear if you try to immediately start manipulating it. Lesson learned on my part. I then created my floral cluster using the Blossoms and Berries collection and added a few bits of greenery using the Curvy Leaves die. Once the panel was completely dry, I used the Shaker Tags dies to create an inset focal point to nestle my bouquet into. And the stitching adds such a lovely touch to the stamped panel. A sentiment and a jewel-studded butterfly completes this card.

Thank you for stopping by and sharing a bit of your day with me. Don't forget to visit Pinkfresh Studio's Challenge post (HERE) to enter your creation inspired by this month's theme/color palette. And one (1) lucky creative will win a $50 gift card to Pinkfresh Studio's online store! The winner will be announced on Wednesday, September 4th.
Good Luck and Happy Crafting!
Keia
Card Supplies:





Happy Monday, lovely friends!
It is time to be inspired by the new Pinkfresh Studio August Challenge| Stripes.


I love monthly challenges because they inspire me to try new creative ideas that I might not have otherwise. As with each Pinkfresh Studio Challenge, there is the option to use the prompt, color palette, or both. This month I decided to use both and see where things would lead me. I love incorporating geometric elements in my designs, so using stripes is perfect for me. To create this card, I inked an A2 card base with Regal Kiss and Soft Lilac dye inks. Once the panel was dry I used the new Slimline Diamond Builder Layering Stencils to add texture to the background. I enjoy using embossing paste, glitter paste, and inks with my stencils. Adding stencil work to the background adds another level of layering that enhances my designs. I used Plum Punch cardstock layered with gold mirrored cardstock for my stripes and adhered this on top of my inked/stenciled panel. The Joyful Bouquet washi tape coordinated perfectly with this month's color palette. I used a few washi tape pieces for my card front and added varying hues of green leaves to the background using the Curvy Leaves dies. A simple, but poignant sentiment, along with gold metallic pearls completes this lovely card.

Thank you for stopping by. I hope you have a chance to step into your craftroom and make something beautiful.
Happy Crafting,
Keia




Social Icons