Menu

  • Home
  • About
  • _Meet the Designer
  • _Partnership
  • _Disclosure
  • Contact
  • _Stay in Touch

Confessions of a Paperholic

Social Icons

Friday, January 28, 2022

Scrapbook.com| Happy Valentine's Day

 Happy Friday, Sweet Friends!


Before we know it Valentine's Day will be upon us! And you know me...if I don't start now my hubby might end up with a Valentine's Day card in March. Who am I kidding, April is more like it. To create this card, I used a few new Scrapbook.com goodies from the Rose color palette to Hexagon Nested die. 


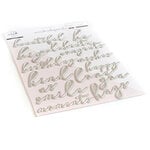
To create this card, I first stamped a white panel with Honeybee Stamps Hugs Enclosed stamp with crisp, black ink. The cute little critter is from Waffleflowers's Sending Love set stamped on Copic-friendly paper and colored with shades of brown and blue. I love the idea of sending a note with the "Happy Valentine's Day" sentiment peeking out of the new Scrapbook.com Mini Envelopes 1. The bold LOVE diecut is layered four times to add dimension and a script "You" is adhered on top. The background seemed a little busy with the collection of elements, so I diecut a vellum hexagon layer to diffuse the bold black and white background. A few red hearts completes this card.


Thank you for stopping by. I hope this card inspires you to step into your classroom and create something beautiful. 


Happy Creating,


Keia 

Card Supplies:

Scrapbook.com - Roses - Smooth Cardstock Paper Pad - A2 - 4.25 x 5.5 - 40 Sheets
Scrapbook.com
Scrapbook.com - Mixed Metals - Glitter Paper Pad - 6x8 - 40 Sheets
Scrapbook.com
Scrapbook.com - Decorative Die Set - Nested Hexagons
Scrapbook.com
Scrapbook.com - Decorative Die Set - Little Envelopes - Classic - Set of 2
Scrapbook.com
Scrapbook.com - Pops of Color - Gloss - Clear - 1oz
Scrapbook.com
Waffle Flower Crafts - Craft Dies and Clear Photopolymer Stamp Set - Sending Love Combo
Scrapbook.com
Honey Bee Stamps - Love Letters Collection - Clear Photopolymer Stamps - Hugs Enclosed
Scrapbook.com
Pinkfresh Studio - Dies - Exclusive - Thin Words Everyday Script
Scrapbook.com
Catherine Pooler Designs - Party Collection - Premium Archival Ink Pads - Midnight
Scrapbook.com

New MISTI Stamping Tool - The Most Incredible Stamp Tool Invented
Scrapbook.com
Sizzix - Big Shot Machine - White and Gray - With Exclusive Ocean Cutting Pads
Scrapbook.com
read more

Monday, January 24, 2022

Scrapbook.Com| Hello...I Miss You

 Happy Monday, Sweet Freinds!!!


I am slowly making my way back into my craftroom. I have been feeling out of sorts and need a moment to creatively reset. There are times when I need to sit and reflect, take stock and process where I can improve as a creative. I love to color with my Copic markers; however, I have been wanting to learn some new techniques. I am interested in adding mixed media techniques to my repertoire. So feeling ready, but not necessarily completed refreshed, I stepped into my craftroom and played with some new craft goodies from Scrapbook.com, as well as adding in distress oxides, watercolors, and embossing paste. 


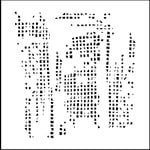
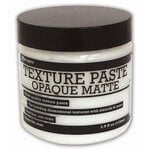
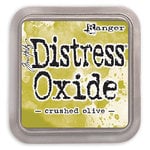
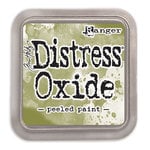
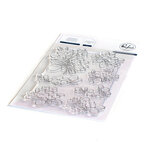
To create this card, I started by using mixed media paper as my foundation. Knowing that I would be using a mix of wet mediums, I wanted to make sure I used paper that could handle various techniques and remain intact without piling. The first layer is spring florals stenciled using Toffee ink dye onto a 3.75" x 5" card panel. To create a tone-on-tone effect, I then stamped a handwritten ledger onto the stenciled panel. Next, I added another stencil layer, but this time I colored embossing paste using Tea Dye and Vintage Photo Distress Inks. The new Shapes Dies Sprigs, from Scrapbook.com, provide a variety of lovely diecut foliage to add to my card. To achieve the varying colors from light to dark, I inked a white cardstock panel with Crushed Olive and Peeled Paint inks and added a touch of Sweet Basil (a deeper green ink from Taylored Expressions) to the tips of the sprigs once diecut. Diecut florals are so much fun to play with, and the Hibiscus Garden from Altenew is no exception. I layered these diecuts from a mix of white and neutral cardstock. Once I had the elements for my card, it was time to assemble it, add a sentiment, and a few gold watercolor splatters to finish the card. 


I love how this card turned out and it was such a blessing to my soul to spend a bit of time playing in my craftroom. It was wonderful layering images and mixing inks with paste. I am learning so much from a new mixed media artist I can across on YouTube. If you are interested in learning how to layer mediums, visit Marta Lapkowska at Marimi SmallArt (here). You will not be disappointed. Until we meet again, I hope you have a wonderful time playing in your crafty space.


Happy Creating,


Keia 


Supplies: 


Scrapbook.com - Stencils - Spring Floral - 6x8
Scrapbook.com
Scrapbook.com - Decorative Die Set - Sprigs
Scrapbook.com
Scrapbook.com - Decorative Die Set - Thank You Sentiments
Scrapbook.com
Scrapbook.com - Neutrals - Smooth Cardstock Paper Pad - A2 - 4.25 x 5.5 - 40 Sheets
Scrapbook.com
Stampers Anonymous - Tim Holtz - Cling Mounted Rubber Stamp Set - Ledger Script
Scrapbook.com
The Crafter's Workshop - 6 x 6 Stencils - Mini Tile Texture
Scrapbook.com
Altenew - Dies - 3D - Hibiscus Garden
Scrapbook.com
Ranger Ink - Texture Paste - 4 Ounces
Scrapbook.com
Kuretake - Gansai Tambi - Watercolor - Starry Colors - 6 Color Set
Scrapbook.com
Ranger Ink - Tim Holtz - Distress Oxides Ink Pads - Crushed Olive
Scrapbook.com
Ranger Ink - Tim Holtz - Distress Oxides Ink Pads - Peeled Paint
Scrapbook.com
Ranger Ink - Tim Holtz - Distress Ink Pads - Tea Dye
Scrapbook.com
Ranger Ink - Tim Holtz - Distress Ink Pads - Vintage Photo
Scrapbook.com
read more

Saturday, January 1, 2022

Pinkfresh Studio| Happy New Year...Blooming With Grace

Happy New Year, Crafty Friends!!


Twenty-Twenty Two is here and it is time to begin a new year of creative adventures with paper, stamps, dies, watercolors, gel plates, and more. I am really looking forward to exploring different mediums as part of my creative process and seeing where the journey takes me this year.


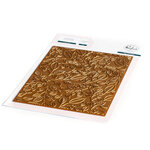
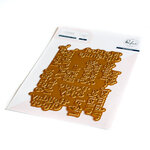
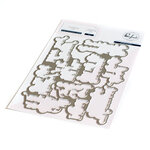
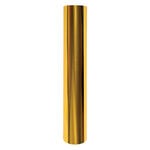
I thought I would start off my first card of the year with the Citrus Bloom collection from Pinkfresh Studio. I like the idea of blooming with grace as my theme for the year and I wanted to creatively turn that idea into a card. To create this card, I used the Lush Vines hot foil stamp and foiled the image onto Spellbinders Glimmer Clear Film Sheets. In case you did not know, this acetate paper is amazing!!! The image foiled beautifully and there is some real heft to the specialty paper. Next, I stamped the Citrus Blooms image onto white cardstock and used the coordinating stencils to add color. The sentiment is from the Perfect Sentiment: Holidays collection. I used Glimmer gold foil for all of my foiled pieces. Once I had all the elements for my card, it was time to adhere the pieces and add a few gold pearls to the flower centers to complete the design. 


Thank you for spending a little time with me today. I am wishing you an AMAZING start to your new year.


Bloom with grace...


Keia 


Card Supplies


Pinkfresh Studio - Clear Photopolymer Stamps - Citrus Bloom
Scrapbook.com
Pinkfresh Studio - Dies - Citrus Bloom
Scrapbook.com
Pinkfresh Studio - Layering Stencils - Citrus Bloom
Scrapbook.com
Pinkfresh Studio - Hot Foil Plate - Lush Vines
Scrapbook.com
Pinkfresh Studio - Christmas - Hot Foil Plate - Perfect Sentiments Holiday
Scrapbook.com
Pinkfresh Studio - Christmas - Dies - Perfect Sentiments Holiday
Scrapbook.com

Pinkfresh Studio - Metallic Pearls - Matte Gold
Scrapbook.com

Spellbinders - Card Shoppe Collection - Glimmer Specialty Clear Film Sheets - 8.5 x 11 - 10 Pack
Scrapbook.com

Spellbinders - Glimmer Hot Foil - Glimmer Foil Roll - Gold
Scrapbook.com
read more
new entries old entries
Subscribe to: Posts (Atom)

Create

Create
"The object isn’t to make art, it’s to be in that wonderful state which makes art inevitable." –Robert Henri

Top hits!

  • Unity's Friends with Flair
    Happy Valentine's Day! I am loving my Valentine's Day gift from my hubby. I am not a chocolate and flowers type of girl. I know, I...
  • Day 1: Taylored Expressions and Faber-Castell Blog Hop
    Happy Thursday! I hope you are enjoying the  Taylored Expressions and Faber-Castell  Blog Hop thus far. As a team of designers we ca...
  • Taylored Expressions Day 2: Sweet Sweet Little One and Nailed It!
    Happy Tuesday Taylored Expressions Fans, How did you like Day 1 of Sneak Peek week? Fabulous inspiration, right? A feast for the eyes =) T...

I Recommend

Thank So Much
Hello Crafty Friends,  It is important to take a moment and say 'thank you'. Or in the case of a paper crafter, create a card with a...

My History

  • ►  2023 (1)
    • ►  October (1)
  • ▼  2022 (26)
    • ►  November (1)
    • ►  September (1)
    • ►  July (5)
    • ►  June (1)
    • ►  May (2)
    • ►  April (3)
    • ►  March (6)
    • ►  February (4)
    • ▼  January (3)
      • Scrapbook.com| Happy Valentine's Day
      • Scrapbook.Com| Hello...I Miss You
      • Pinkfresh Studio| Happy New Year...Blooming With G...
  • ►  2021 (113)
    • ►  December (4)
    • ►  November (6)
    • ►  October (14)
    • ►  September (17)
    • ►  August (7)
    • ►  July (7)
    • ►  June (5)
    • ►  May (8)
    • ►  April (11)
    • ►  March (10)
    • ►  February (11)
    • ►  January (13)
  • ►  2020 (25)
    • ►  December (10)
    • ►  November (8)
    • ►  September (2)
    • ►  February (1)
    • ►  January (4)
  • ►  2019 (41)
    • ►  November (1)
    • ►  October (6)
    • ►  September (5)
    • ►  August (4)
    • ►  July (4)
    • ►  June (6)
    • ►  May (4)
    • ►  April (5)
    • ►  March (2)
    • ►  February (4)
  • ►  2018 (37)
    • ►  October (4)
    • ►  September (4)
    • ►  August (2)
    • ►  July (3)
    • ►  June (5)
    • ►  May (4)
    • ►  April (4)
    • ►  March (4)
    • ►  February (4)
    • ►  January (3)
  • ►  2017 (58)
    • ►  December (8)
    • ►  November (9)
    • ►  October (10)
    • ►  September (4)
    • ►  August (4)
    • ►  July (2)
    • ►  May (4)
    • ►  April (4)
    • ►  March (4)
    • ►  February (5)
    • ►  January (4)
  • ►  2016 (54)
    • ►  December (7)
    • ►  November (3)
    • ►  October (5)
    • ►  September (4)
    • ►  August (4)
    • ►  July (1)
    • ►  June (7)
    • ►  May (4)
    • ►  April (4)
    • ►  March (4)
    • ►  February (5)
    • ►  January (6)
  • ►  2015 (82)
    • ►  December (5)
    • ►  November (4)
    • ►  October (5)
    • ►  September (9)
    • ►  August (5)
    • ►  July (5)
    • ►  June (14)
    • ►  May (5)
    • ►  April (4)
    • ►  March (8)
    • ►  February (8)
    • ►  January (10)
  • ►  2014 (97)
    • ►  December (10)
    • ►  November (8)
    • ►  October (9)
    • ►  September (8)
    • ►  July (5)
    • ►  June (5)
    • ►  May (9)
    • ►  April (11)
    • ►  March (10)
    • ►  February (9)
    • ►  January (13)
  • ►  2013 (70)
    • ►  October (5)
    • ►  September (5)
    • ►  August (6)
    • ►  July (11)
    • ►  June (5)
    • ►  May (8)
    • ►  April (7)
    • ►  March (8)
    • ►  February (5)
    • ►  January (10)
  • ►  2012 (62)
    • ►  December (2)
    • ►  November (2)
    • ►  October (1)
    • ►  September (4)
    • ►  August (9)
    • ►  July (8)
    • ►  June (4)
    • ►  May (2)
    • ►  April (6)
    • ►  March (6)
    • ►  February (9)
    • ►  January (9)
  • ►  2011 (27)
    • ►  December (3)
    • ►  November (1)
    • ►  September (2)
    • ►  August (3)
    • ►  July (5)
    • ►  May (4)
    • ►  April (4)
    • ►  February (2)
    • ►  January (3)

Send me a message!

Scrapbook.com

Shop!

Altenew

© Confessions of a Paperholic.
Theme by Eve.