
Happy Monday, Sweet Freinds!!!
I am slowly making my way back into my craftroom. I have been feeling out of sorts and need a moment to creatively reset. There are times when I need to sit and reflect, take stock and process where I can improve as a creative. I love to color with my Copic markers; however, I have been wanting to learn some new techniques. I am interested in adding mixed media techniques to my repertoire. So feeling ready, but not necessarily completed refreshed, I stepped into my craftroom and played with some new craft goodies from Scrapbook.com, as well as adding in distress oxides, watercolors, and embossing paste.
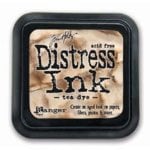
To create this card, I started by using mixed media paper as my foundation. Knowing that I would be using a mix of wet mediums, I wanted to make sure I used paper that could handle various techniques and remain intact without piling. The first layer is spring florals stenciled using Toffee ink dye onto a 3.75" x 5" card panel. To create a tone-on-tone effect, I then stamped a handwritten ledger onto the stenciled panel. Next, I added another stencil layer, but this time I colored embossing paste using Tea Dye and Vintage Photo Distress Inks. The new Shapes Dies Sprigs, from Scrapbook.com, provide a variety of lovely diecut foliage to add to my card. To achieve the varying colors from light to dark, I inked a white cardstock panel with Crushed Olive and Peeled Paint inks and added a touch of Sweet Basil (a deeper green ink from Taylored Expressions) to the tips of the sprigs once diecut. Diecut florals are so much fun to play with, and the Hibiscus Garden from Altenew is no exception. I layered these diecuts from a mix of white and neutral cardstock. Once I had the elements for my card, it was time to assemble it, add a sentiment, and a few gold watercolor splatters to finish the card.

I love how this card turned out and it was such a blessing to my soul to spend a bit of time playing in my craftroom. It was wonderful layering images and mixing inks with paste. I am learning so much from a new mixed media artist I can across on YouTube. If you are interested in learning how to layer mediums, visit Marta Lapkowska at Marimi SmallArt (here). You will not be disappointed. Until we meet again, I hope you have a wonderful time playing in your crafty space.
Happy Creating,
Keia
Supplies:






Happy Wednesday, Crafty Friends!
Today, Pinkfresh Studio and Waffle Flower are hosting an Instagram Hop to showcase their amazing stencils, water media mat, new stenciling mats, and coordinating brush holders. Come join us for a little creative fun!


Okay, when I am in the craft zone my craft space shrinks from its normal 6 feet space to a mere 12x12 space. And then the next thing I know, I need to clear space so that I can ink a background, do stenciling work or add a few watercolor splatters. Yeah, this is not going to work. Introducing the water media mat from Waffle Flower. Now, the water media mat from Waffle Flower has been out for a little over a year; however, the mat is new to me (VIDEO HERE). The water media mat is perfect for clearing a clean space so that I can do a technique or two without clearing my entire workspace. The water media mat has a place to fit a 9x12 sheet of watercolor paper, or other paper medium. There is also a spot to hold your watercolors, including smooshing your mini-inks into the square tray. One of the downsides is that this mat does stain. The mat is meant to be used, so if a stained mat would drive you crazy then this might not be ideal for you.

To create my card, I started by using Waffle Flower's Big Dots stencil to create a rainbow of color. I then applied glitter paste on top to add a little sparkle. While the panel was drying, I diecut the word THANK using Heather's Uppercase Alphas from white and colored cardstock for the outlines. The word You is diecut from Pinkfresh Studio's Phrase Builder: You dies. I then layered my sentiment onto the rainbow panel and adhered this to an A2 top folding card base. And my rainbow THANK You card is complete. Simple but pretty.

If you love stenciling, then head over to Waffle Flower's Instagram page (HERE) for a chance to win their entire release. In addition, Pinkfresh Studio (HERE) is also gifting one lucky creative with a $25 gift certificate to each store!! For full details and more stencil inspiration, head over to Instagram!! You will be glad you did!
Happy Crafting!
Keia
Card Supplies:



Happy Monday, Crafty Friends!
I hope your week is off to a great start! I had a chance to play around in my craftroom last week in preparation for National Scrapbook Day and it was glorious. It had been some time since I incorporated mixed media techniques into my work, and I am a bit rusty. I love all the layers, but it takes a moment for things to dry between layers. However, playing and revisiting a technique or two was just what I needed to refresh myself creatively.

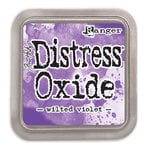
I love how this 5x7 piece turned out. This card is definitely a labor of love. A friend saw the finished piece and has already claimed it. I am glad she will be encouraged by the Biblical text. To start this project, I made sure to use mixed media paper. If you do not use the right paper, the addition of wet mediums will warp your project, and you will not achieve the desired end results. I first added the violet color palette to the top right corner of the page. Starting first with a light color and gradually adding more. I then flicked water onto the paper to give the piece an aged look. Using a paper towel I removed any excess. I let this dry before applying my next layers. (You can use a heat tool if you would like to speed up the drying time.) Next, I randomly added the script stamping to the panel and then using the Dashed stencil to add another layer of visual interest.

I let all of this dry before using texture paste and The Crafters Workshop Angel Wings stencil. This keeps the embossing paste from soaking up the color of the bottom layer. I then added white inky splatters and heat embossed the sentiment. Now it was time to focus on the floral arrangement. I love the Keep Going coordinating stamp/die from Pinkfresh Studio. I used my Copic markers and colored pencils to color this lovely stamp set. As you know, we scrappers have a lot of little treasures hiding in our craftrooms. I scavaged for some lovely paper flowers I had kept for years and added this as another layer of texture and depth to the bouquet. A few curvy vines intertwined in the bouquet adds a nice touch.

The last piece is the lovely alcohol-inked butterfly with a vellum overlay. To be honest, this alcohol panel has been in my craftroom for a few months. I warned you that I keep things for a bit of time. I have used a piece of the alcohol panel here and there, but this was the perfect project for this finishing touch. I just love how this mixed media card turned out and I am so happy that it will bless a fellow crafter.
Thank you for stopping by. I hope you have a chance to step into your creative space and make something beautiful.
Happy Crafting,
Keia
Supplies:



Scrapbook.com




Social Icons