Happy Saturday, Sweet Friends!
I am finishing out the month of July with one more sweet paper confection from Pinkfresh Studio featuring the Happy Blooms collection.
The layout for this card was inspired by Therese from Lost in Paper. If you do not know this amazing paper artist, then please use the link to check out her work. When I saw this layout I knew I wanted to use it for a future card project. This layout helps utilize the slimline card size in a visually pleasing way and helps break up the space, which can sometimes be overwhelming. Pinkfresh Studio's use of stamps, stencils, and dies make creating a beautiful card within reach for any paper crafter. To create my floral bouquet, I used the Happy Blooms stencils to color in the stamped and diecut piece. I used my colored pencils to add a bit more shading. The Everyday Script die set is perfect for adding a delicate diecut sentiment to any card. A simple sentiment and a sprinkling of blue jewels complete this card.
Thank you for stopping by! I hope you have a lovely, crafty weekend!
Happy Crafting,
Keia
Card Supplies:
Hello, Whimsy Friends!
I am so excited to be back this week to share a card featuring the Gnome One Else stamp/die and Build A Fairy Garden die sets. Okay, let me just put it out there, I have seriously been searching for gnomes to add to my stamping collection and low and behold, Whimsy Stamps has some of the cutest gnomes ever! And then I came across these awesome mushroom dies in the Build A Fairy Garden set and I was in creative "need mode." These two items pair together so nicely. Swoon-worthy for sure.
To create this card, I started by stamping, Copic coloring, and diecutting the ever-so-sweet gnome couple. To achieve this depth of coloring and shading, I like to pair my Copic coloring with colored pencils. I find that layering colored pencils on top of Copic markers provide me with more control and the ability to better color smaller, intricate images. Coloring this image took me about 1.5 hours, but I love how it turned out.
The mushrooms are so fun to play with as there are several techniques you can use to color these diecuts. In the end, I chose to ink my mushrooms with dye inks using a range of colors from deep reds and yellows to subdued browns. Once the mushrooms were assembled, I was ready to put together my card. A few layered mushrooms, a loving couple, sweet sentiment, and an enamel heart complete this card. I designed this card with my hubby in mind. We will be celebrating our twentieth wedding anniversary in a few weeks. And truly, "There's Gnome One Else for Me."
Thank you for stopping by and spending a bit of time with me. I enjoyed my time as a guest designer with Whimsy Stamps. I hope you are feeling inspired to step into your crafty space and make something beautiful.
Happy Crafting,
Keia
Card Supplies
Hello, friends!
I am back today with another card from Pinkfresh Studio's July release.
This card features the new Joyful Bouquet stencil to complement the previously released stamp and die. To create this card, I stamped the image onto white cardstock and used the stencils to color this beautiful floral bouquet. I took a second A2 white cardstock panel and dry embossed it using the Color Block Stripes die and cut it at an angle. I then added the floral bouquet to the panel and trimmed the excess. Using foam tape I adhered the bouquet panel to an A2 card base, stamped a sentiment in Detail Black ink, and added a few jewels to complete this card.
Thank you for stopping by. I hope you are enjoying this release and it is sparking your creativity. As with each release, Pinkfresh Studio loves spreading joy. Check out the Creative Team lineup and guests on Instagram for a chance to win the entire release by leaving a comment on the Pinkfresh Studio, and 10 creatives have a chance to win $25 gift cards by leaving comments along the hop. Winners will be announced and tagged on Pinkfresh Studio's Instagram Stories on August 3, 2021. So head on over to Instagram for a chance to win some craft awesome from the July release.
Happy Crafting,
Keia
Happy Monday, Crafty Peeps!
What a great way to keep off the week with a little craft happiness. Today is Pinkfresh Studio's July release filled with amazing floral designs, hot foil stamps, dies and layering stencils so let's jump on in and get crafty!
Pinkfresh Studio is known for its wonderful floral collections and the Sweet Friend stamp, die, stencil and hot foil stamp are no exception. So here is a little honesty from one creative to another, hot foiling still makes me a little nervous; however, I have been playing around a bit and hopefully have cracked the code for my machine (Go Press and Foil by Coutre Creation). Hot foiling really is about knowing what paperweight and the number of paper shims that work with your system. In my case, I found that 110 lbs. cardstock with one 80 lbs. paper shim works to give me nice foil coverage and letterpress quality impressions.
To create this card, I used the Sweet Friends hot foil stamp to create my floral bouquet and used the coordinating stencils and die to color and diecut the pieces. I cut a 3x3 rectangular square and used Mermaid Cove, Tidal Pool, Ocean Breeze, and Aquamarine inks to create an ombre effect for the background. I then used Heather's Uppercase and Lea's Ornate Lowercase alphabet dies to spell Hello. I backed the white diecut letters with gold foiled cardstock to coordinate with the foiled florals. I added a subtle design to the A2 background by using the Simple Diamonds die and a dry embossing technique. A few Metallic Pearls in gold and a heat embossed sentiment complete this card.
The fun is not over yet! As with each new release, Pinkfresh Studio is offering one lucky winner a chance to win the ENTIRE July release and 10 creatives will win $25 gift certificates to the online store. To win the entire release, leave a comment on Pinkfresh Studio's Blog (HERE) and Youtube Channel (HERE). To win one of 10 gift certificates, leave a comment on each blog along the hop. Blog winners will be chosen from the comments and all winners will be announced on August 3, 2021, on the GIVEAWAY page (HERE).
Pinkfresh Studio Extras...YEAH!!!!
You are invited to the Inlinkz link party!
Click here to enterHappy Friday, Sweet Friends!
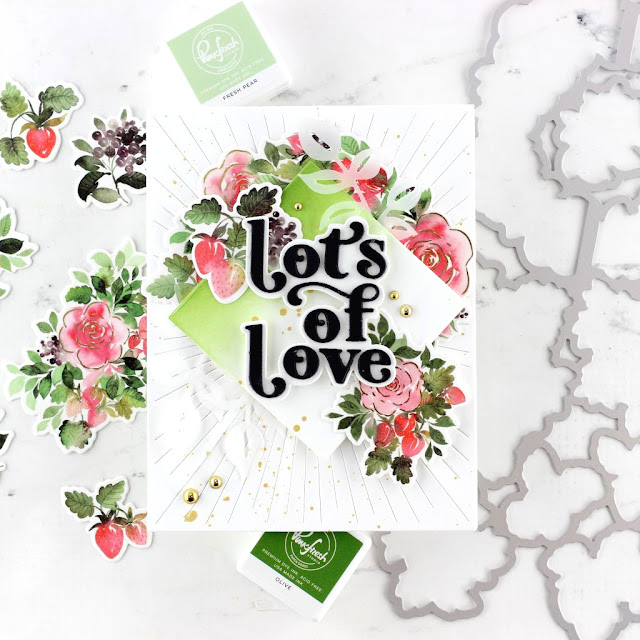
Time to round out the week with a little bit of LOVE. Today, I am sharing a card featuring a lovely washi tape collection from Pinkfresh Studio, Blossoms and Berries.
The washi tape collections from Pinkfresh Studio are so easy to use and make creating beautiful cards a breeze. To create this card, I applied the washi tape to a piece of white cardstock and then diecut the panel. To add interest and layers, I cut a square and inked the piece using Olive dye ink and diecut an A2 background using the Essentials: Radiating Background 2 die. Together, I layered the pieces to achieve a visually appealing card with depth and rich in color. A few inky gold splatters and a bold sentiment complete this card.
Thank you for stopping by. I hope you have a chance to step into your craftroom and create something beautiful.
Happy Crafting,
Keia
Card Supplies:
Good morning, Crafty Friends!!!
Happy Thursday! Today, I am sharing a card made with AWESOME stamps from Whimsy Stamps. If you have not had a chance to check out these cute stamps, please do! I had so much fun coloring this cute dragon illustrated by Dustin Pike. Usually, my card designs involve beautiful floral arrangements; however, it was a nice creative change of pace to try my hand at designing with mythical creatures.
Okay, I was a little nervous coloring this cute little guy, but I decided to just drive right in. I have not been in my craft room for several weeks due to health reasons and the thought of jumping back into coloring felt overwhelming. However, I am so glad I did! It was so fun to mix and match colors. Seriously, a dragon can be any color I imagine, correct? I used Copic colors V12, V15, V17 for the body and slowly layered my colors starting with the lightest color, adding shading with the darkest, and then using the mid-tone color to blend the colors together. I proceeded to do the same with the duck water floatee, using Y11, Y13, Y15, Y17 with a bit of YR16, YR18 for the orange highlights. The belly and horns were colored using E30, E31, E33, E35, and a smidge of E37. The cloud background was created using the Mini Cloud Background rubber stamp, which is a lovely addition to my stamp collection. I will definitely be using these stamps again. The simple sentiment of "You Got This!" resonated with me at this time in my life.
Thank you for stopping by. I hope you have a chance to head into your craft room and create something magical! And visit me next week for more crafty fun with Whimsy Stamps!
Happy Crafting!
Keia
Card Supplies:
Whimsy Stamps| Dragon Water Fun, Mini Cloud Background
Happy Friday, Friends!
Can we talk craft room organization? I LOVE organizing my creative space. In a house full of men, my craft room is a place where I am free to play with color, display my collection of pretty, delicate items and just spend a little quiet time letting my creativity lead me down a path of discovery.
I have not always had a dedicated craft space. As a military family, space can be at a premium. However, I have always carved out a space to create whether it was a small kitchen table with a rolling bag of supplies, a leaky basement in base housing, or now a little piece of creative heaven. My craftroom is not very large, so making sure I find creative and flexible storage solutions is key to getting the most out of my space.
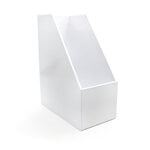
Finding workable solutions for my growing paper collection is important. As a design team member for several companies, I like to organize my paper pads by each company and keep paper collections together (ephemera, enamel dots, and 6x6 paper pads). I used the Tall Sticker Organizer from Scrapbook.com to house my Pinkfresh Studio paper collections and Scrapbook.com cardstock paper pads. I made a few modifications to make the Tall Sticker Organizers work for me by using styrofoam to create risers and used the white-tabbed dividers to separate my paper collections. The 6x8 Paper Pad Holder easily accommodates several 6x8 paper pads.
With a variety of sizes, the envelopes are perfect for organizing single projects, multiple stamps and dies, and keeping my scrapbooking photos and DT assignments in order. I keep my filled storage envelopes in stackable paper trays for easy access as I work on my monthly assignments.
I hope this look at how I use some of Scrapbook.com's Craft Basics provides you with a few organizational ideas for our own crafty space. Thank you for stopping by!
Happy Organization,
Keia
Craft Room Basics:


Social Icons