Whew! You made it! You just completed your signature
masterpiece—the perfect card—and you are now ready to take and share a
photograph of your creation with friends and family, but where do you start.
The journey through project photography can be fun and exciting as you play
with lighting, backdrops and props, and lastly photo editing software. Today, I
will be sharing with you a few of the things I have picked up along the way on
my own photographic journey.

I use a photo cube that I purchased through Amazon. The kit
includes the collapsible photo cube, two lights and three backgrounds (white,
red and black). I purchased an additional light, which is positioned in the
back. The photo cube allows me to have greater lighting flexibility. I have
younger children and work, which means I do most of my photographing in the
evening without natural lighting. While natural lighting is best, it is not
necessarily an option I can always utilize. The photo cube allows me to
manipulate light and the effects of shadowing on my projects. I chose to
purchase a large cube for greater flexibility. I can photograph cards, as well as
other larger sized projects.

My craft room is all about repurposed or found objects. I am
using my sons’ old play table to sit the photo cube on and chairs from my craft
room and desk are utilized to raise the lighting to the same height.

I have recently started adding visual interest to my
photographs. This has been a case of trial and error for me. What might look
visually appealing doesn’t necessarily translate well in the finished
photograph. I highly suggest playing around with various heights, colors,
textures to find what works best for you. I love finding interesting objects at
vintage markets and fairs.
I have several vinyl 2’ x 2’ backdrops that I purchased from
Swanky Backdrops. These backgrounds are easy to hang and clean and offer a
level of texture and color to my work.

Unedited card photograph

I use GIMP, a free online, open-source, photo editing
software program. I will share with you a few of some of my most used features
from this program.

I use the Adjusting Color
Curves feature to lighten the layers within the photography, specifically
each pixel’s RGB (red, green, blue) values.

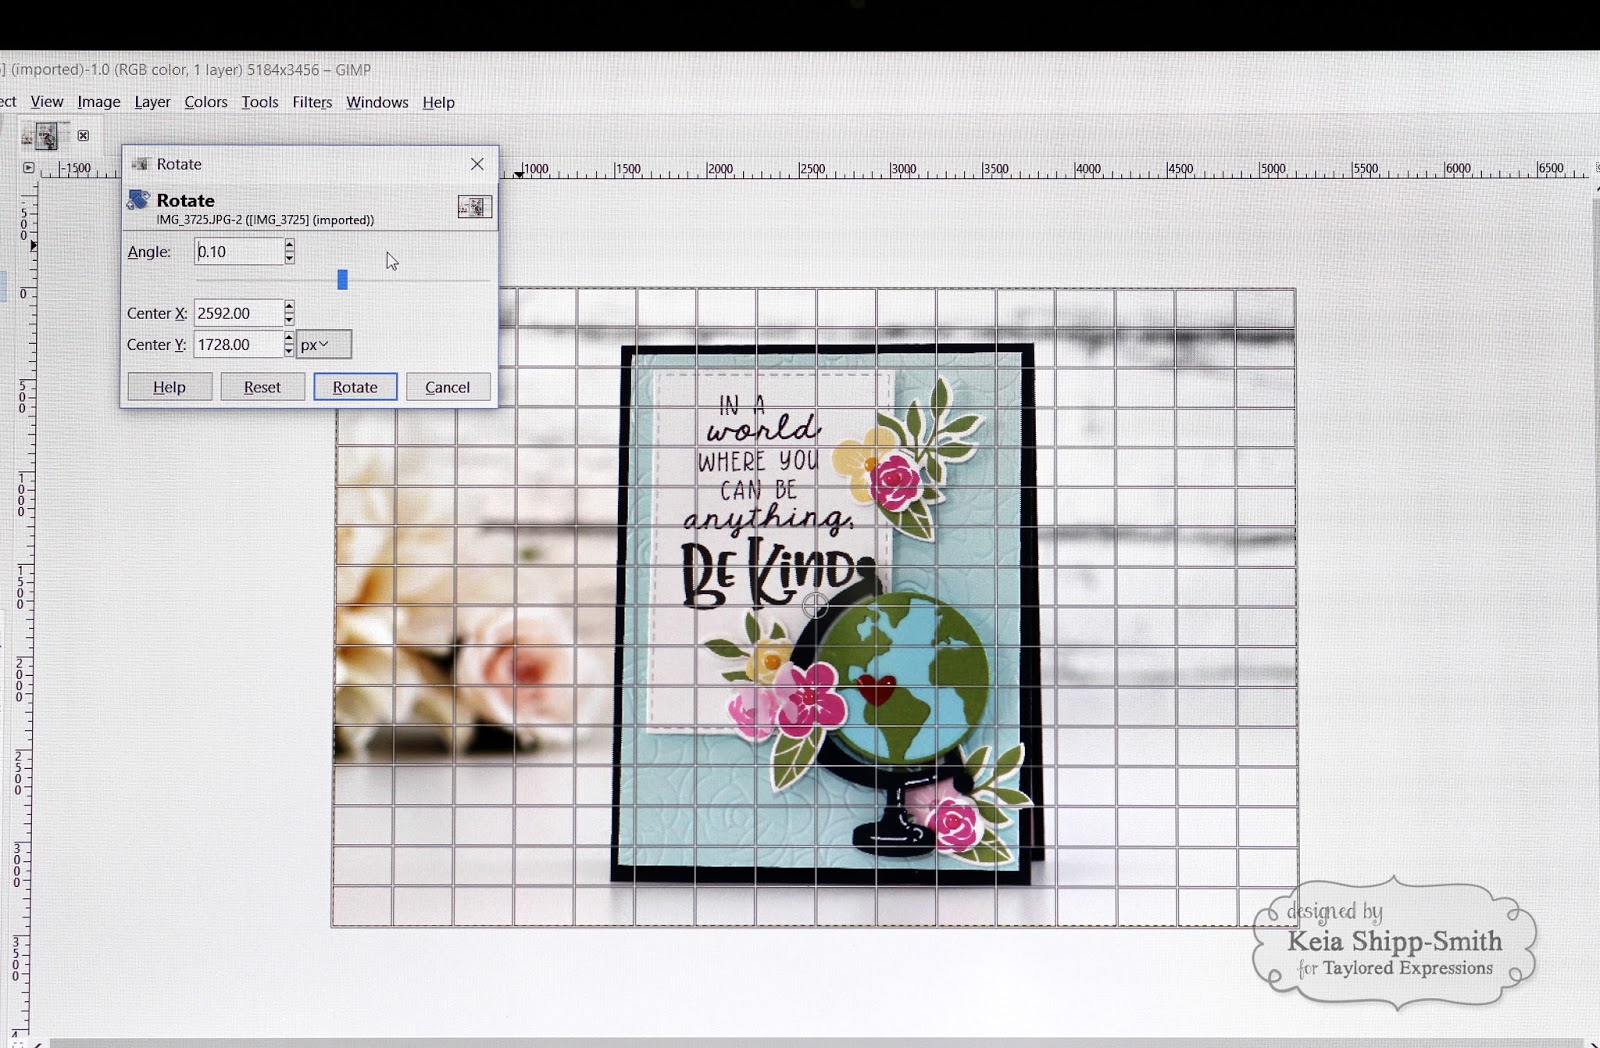
I cannot write that I always photograph my pictures
perfectly. I am surprised at the number of times a picture is slightly askew.
The Rotate feature is very handy in
allowing me to rotate a picture along the X and Y axis.
As part of my assignments, I need to watermark my
photographs. There are several steps to this process: opening layers, adjusting
the size of the layer using the Scale
feature, and then merging the layer onto the photograph. With the Scale feature, it is important to
note the need to lock the link. This allows the resized layer to be
proportionally adjusted on both the X and Y axis.

Hooray! The edited photograph. There are many other
wonderful features to play with in GIMP. The ones listed above are just a few
features I use to edit my photographs. I hope you have a chance to explore
photo editing software and see where it leads you. Happy photographing!
Happy Crafting,
Keia
Equipment:
Camera: Cannon T3i
Lens: Cannon 85 mm
Flash: Cannon Speedlite 430EXii
Setting: Creative Mode, Vivid, Blurred Background (bokeh
effect)
Lighting: Photo Cube and lamps using Ottlite natural
light bulbs


Join the conversation!