
Hello, Crafty Friends!
Today, we are Celebrating Christmas in July with Spellbinders. This is a fabulous way to be inspired by an array of amazing designers and get you into the holiday spirit. My simple Joy card features Spellbinders Christmas Jasmine and Skinny Stripe Background hot foil stamp.

To create this card, I foiled a black A2 card panel using matte silver foil and the Skinny Stripe Background hot foil stamp. I love the look of the silver foil against the crisp black cardstock. I then used a circle die to create a window for my shaker bits and "Joy" sentiment. However, the real star of this card is the Christmas Jasmine. If you have not seen the floral arrangement videos by Susan Tierney Cockburn, then you are in for a treat. This amazing designer shares her passion for all things floral and provides lovely tutorials on making paper florals come alive. Hint...it involves special tools that help with providing veining for the leaves, and how to mold a paper flower using different ball styluses to create depth and texture to the paper petals. Once I learned the basics of paper floral design, it was time to play with these amazing dies to create 3-D flowers. I just love how they turned out. I completed the card with a few silver beads.
.JPG)
Thank you for joining me. I hope you have a chance to step into your craftroom and create something beautiful!
Happy Crafting,
Keia
Card Supplies:


Happy Friday, Crafty Friends!
I am popping in to share a card for Scrapbook.com's Christmas in July Celebration! Today's card features the new Snowflakes dies paired with the Block Outline Christmas Dies, a soon-to-be favorite in my Christmas cardmaking stash.

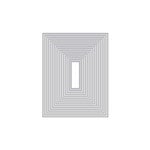
To create this card, I started by cutting a piece of the top panel to fashion a window for my layered snowflakes. I then set the panel aside to start diecutting my snowflakes from shades of red cardstock. Since the diecut snowflakes are intricate, I recommend diecutting the snowflakes several times and layering them to add heft and dimension. I diecut a few of the snowflakes from glitter cardstock to add a bit of festive flare. However, since the glitter cardstock is on a plastic-like backer, be sure to use a metal shim to achieve a clean cut when diecutting. I diecut the "Merry" from various shades of red and layered the letters several times to add dimension. I finished the card with a simple "Christmas" sentiment heat embossed onto black cardstock using the Christmas Expressions stamp set.
.JPG)

Okay, I think I am on a roll now! Looking forward to sharing next week's Christmas in July card. Until then...create something beautiful every day!
Happy Crafting,
Keia
Supplies:


Hello, crafty friends!
Happy Friday! We made it to the end of the week and what a week it has been. This weekend I am hoping to step into my craft room and enjoy a little me time. I am loving Scrapbook.com's Christmas in July celebration and I would love to make a few more cards for the occasion.

Seriously, it is never too early to start making Christmas cards. This way I am ahead of schedule instead of playing catch up. To create this card, I paired some of my favorite Scrapbook.com dies, I am looking at you Sprigs and Mini Envelope dies, with the new slimline Mod Trees stamp. As I have written before, the slimline format is not my creative jam; however, this does not stop me from incorporating slimline stamps and dies into my design. I first started by die cutting the Nested Trees dies from a piece of navy cardstock. I then took another navy cardstock panel and heat embossed the Mod Trees using Ranger's Gold Tinsel embossing powder. I layered the two panels together using foam adhesive to add dimension to my card front. The ephemera cluster uses a few pieces from Pinkfresh Studio's Holiday Magic collection paired with Scrapbook.com's Mini Envelope and Sprigs dies. The simple FaLaLa diecut sentiment completes this card.

Thank you for spending time with me. I hope this card inspires you to spend time in your creative space.
Happy Crafting,
Keia
Card Supplies:


Good morning, Pinkfresh Studio Friends!
Pinkfresh Studio's December Release| Stamp, Die, Stencil, and Hot Foil is now available! We are so excited to have you join the Pinkfresh Studio Blog Hop. Prepare to be inspired, have a chance to win amazing prizes, and be a part of a wonderful, creative community. Today's card features the new Built on Dreams paired with the Thrill of Hope Wreath layering stencils.


Thank you for joining me; however, the fun is not over! As with each release, Pinkfresh Studio loves to share the love. Continue along the hop for a chance to win 1 of 10 $25 gift certificates. Leave a comment on the blogs along the way for a chance to win. The lucky winners will be announced on December 21st. You can find the winners on the GIVEAWAY Page (HERE). Good Luck and Happy Holidays!


Happy Saturday, Crafty Friends!
Today, I am sharing Scrapbook.com's new stamp Christmas Foliage. If you are still loving this slimline size, then this latest release of stamps is just for you.

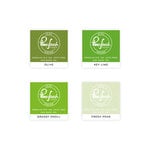
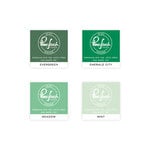
Did you know there are 91 days until Christmas? I am a mom of young boys, so this is important information to know and in a timely manner! And I need to get a jump on my Christmas cards. Glad I have one down. 😆 Who is with me? How many Christmas cards have you completed? Okay, so you can see why I am a little excited that I have at least one. And creating this card was fairly easy once I had a design in mind. To start, I used the Slimline Nested Rectangles for the card's foundation and inked this with Evergreen, Olive, and Fresh Pear dye inks. Once the panel was dry, I die cut a small rectangular piece for the FA LA LA center. I then heat embossed both pieces using the Slimline Christmas Foliage stamp and gold embossing powder, the center for the sentiment, and the larger panel with the foliage pattern. I used Pinkfresh Studio's Poinsettia Christmas Washi Tape and coordinating dies to build my floral bouquet. A few leaves and metallic gold pearls completes this festive and beautiful card.

Thank you for sharing a part of your weekend with me. I hope this card has inspired you to start working on your Christmas cards. And if you are already ahead of the game, wonderful! Then I hope you have a chance to step into your creative space and make something beautiful.
Happy Crafting,
Keia
Card Supplies:


Social Icons