Happy Wednesday TE Fans,
How have you enjoyed the festivities so far? Today we are rounding out TE's 9th birthday celebration by hosting a scavenger hunt! Visit the Taylored Expressions' blog where you can find clues and then hop around the design team's blogs to find the answers. Taylor will draw one lucky winner, from among all the correct guesses, to win a fabulous prize package! Ready to get started? Let's go!
Today, I am sharing with you a card featuring the new Big Blooms collection. These stamps will allow you to use beautiful flowers as backgrounds for your cards or as the main attraction. The options are only limited by your imagination.
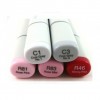
To create this card, I used Strathmore's mixed media paper. I knew I wanted to use a script die in the center of the card. I thought it would be prudent to use a paper that would maintain its integrity during the stamping, Copic coloring and die cutting process. I stamped the flowers and then masked their images in order to stamp the leaves. Once this was done, I colored the flowers with Copic markers. After coloring, I die cut the word "blessed" into the colored panel (being careful to keep ALL the pieces). Then, I die cut the word "blessed" several more times from the mixed media paper, and glued each layer onto the next. I carefully inserted the layered word back into the panel, and then flipped the panel over to tape the die cut into place. Now a layer of adhesive, from the tape, allowed me to put the small colored pieces into place. Lastly, I adhered the partially Copic colored "blessed" into place. Done. I love how the finished product turned out!
Card Size: A2
Card number two features the new Blooms Overlay, which complements the Sympathy Blooms Cutting Plate. How fabulous it that? Now you can add dimension to the cutting plate design. Yeah! However, for this card I showed how you could also use the complementary Blooms Overlay to create a unique background and pair it with TE's Bloomers dies.
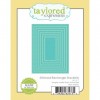
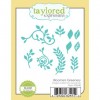
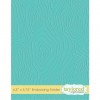
To create this card, I die cut the Blooms Overlay several times (nine times to be exact). I then took and A2 sized piece of Sugar Cube cardstock and inked it with Delicata Gold Glitz ink to create a gold, shimmer background. Next, I created my background pattern using the Blooms Overlay die cut pieces, and adhered them to the inked A2 panel once I was happy with the result. I used to Stitched Rectangle Stacklets to die cut the completed panel. Using various TE cardstock and Bloomers dies, I die cut a fall floral bouquet. The "thanks" script die was a perfect complement to the paper bouquet. And keeping with the woodland theme, I used the Woodgrain embossing folder to emboss an A2 sized piece of Chocolate Truffle cardstock for the base of the card. In the end, I was really excited to see how a complementary die could create a visually interesting card all on its own. What a great way to get the most out of your dies!
Thank you for stopping by. But as you know with any celebration, the fun is not over yet! Don't forget to visit the TE Blog (HERE) for a chance to participate in the scavenger hunt and for more crafty inspiration.
Also, today's the last day to enter the TE 9th Birthday Sketch Challenge for your chance to win Taylor's Favorite Things or an opportunity to guest design with the Creative Team for the month of October! Wahoo! Click (HERE) for all the details!
Happy Hunting!
Keia
Card Size: A2
Card Supplies:
Subscribe to:
Post Comments (Atom)











Join the conversation!