



Scrapbook.com







Happy Tuesday, Crafty Friends!
Happy indeed! The wait is over! The RESTOCK of the Magic Mat is here!!!

If you were on the fence, or like me, on the waiting list for another Magic Mat, then the wait is over! Today at 9am MST is the restock release. I have the Magic Mat in two sizes, standard and the extended size, and I love them both!

I enjoy using the Magic Mat for my diecutting needs. It is AWESOME to not worry about warping plates and I am even able to use the Magic Mat with my magnetic plate! I have not had any issues with the Magic Mat dulling my dies over time. My machine is a little loose, so if I am diecutting a more intricate die, I just use a paper, plastic, or metal shim and that takes care of the problem. I am hoping to snag another mat or two for my crafty friends. Let me know what you think of the Magic Mat if you own the mat already. Or, leave me a comment with any questions you might have. And if you are interested in seeing the Magic Mat in action, or have more questions regarding diecutting machine compatibility, check out this helpful page (HERE).
Happy Crafting,
Keia


Happy Sunday, Crafty Friends!
Today kicks off Pinkfresh Studio's Monthly Challenge—Florals (HERE). I know we are all wishing for a bit of spring in the air, so this challenge is perfect for crafting a pretty pastel bouquet.


The idea for my card came about from the monthly coffee meetings I use to have with a dear friend. Ten-years my senior, I loved chatting with my friend Susan as we discussed a myriad of topics in a safe, open space. We were just two sisters-is-Christ seeking to understand ourselves and the spaces we occupy. I missed our chats during the pandemic. However, we recently had a chance to reconnect in February and it was as if time had not affected our love and admiration for one another. Susan has such a beautiful soul and the sentiment on the card is a true reflection of her personality.
To create my card, I started by using the new Rustic Floral Wreath layering stencil and die set paired with Passion Fruit, Coral Reef, Lemon Whip, Marigold, Aquamarine, Ocean Breeze Gathered Twigs dye inks. Pinkfresh Studio's March Challenge is inspired by the new Keeping It Real paper collection, which is perfect for both cards and scrapbook layouts. I used a few of the ephemera pieces and 6x6 paper pad in designing this card. I then adhered the layered focal point onto the dry embossed Nested Chevron background. A simple, but meaningful sentiment, from the My Favorite Things To Say #2 stamp set completes the card.

The Pinkfresh Studio's March Monthly Challenge (HERE) is open from March 7th-30th. And as with each challenge, two lucky creatives will have a chance to win a $50 gift card to Pinkfresh Studio's online store. For more details and inspiration, don't forget to visit Pinkfresh Studio Monthly Challenge Page. And please use the hashtags #pinkfreshstudio, #pinkfreshstudiochallenge, and @pinkfreshstudio so we can stop and appreciate your beautiful projects!

Happy Crafting,
Keia

Happy Wednesday Crafty Friends,
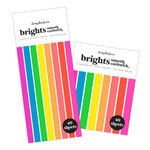
I hope your week is off to a fabulous start. Over the weekend, the new Scrapbook.com Brights Bundle arrived (includes slimline and A2 sizes). I didn't have a chance to play with the new paper pads until early this week. Here is what I can write, if you have been wanting to add a POP OF COLOR to your crafts then this is the paper bundle for you. Sunglasses not included. LOL.

I am a huge fan of geometric and retro-hip designs, so when it was time to design with this paper bundle I knew exactly what I wanted to do. I had purchased Waffle Flower's Nested Diamonds dies and had not had a chance to use them, so I pulled the nested dies, Pinkfresh Studio's Heather Lowercase Alphas, and Altenew's Dot Art stamp set and got to work. I used the neon warm tones from the paper pad and paired it with black and white to complete my retro-hip color palette. I used every other diamond die to create my focal point. I started by diecutting a large diamond then nesting the next die inside the diecut piece to create my pattern. Once I had all my pieces, I attached them to a piece of A2 cardstock with adhesive and diecut the panel with the larger diamond nesting die. I then cut the diecut piece in half. I continued the color palette with the alphas and used the Brights colors for the letters' outline. To ground the bold colors, I used inked images from the Dot Art stamp set to visually bracket the diecut design.

I hope this card has inspired you to add a little color to your projects. If you are interested in seeing more inspiration using the new Brights Bundle, check out the (prerecorded) YouTube Live video on Scrapbook.com's social media platform on Thursday, March 4th at 10am CST (HERE). If you are interested in this bundle, be sure to add other items to your cart before the Brights Bundle Flash Sale. This way you can get all your crafty goodies before supplies run out.

Happy Crafting,
Keia
Supplies:




Social Icons