

Happy Wednesday, Crafty Friends!
Whew!! It has been a hot minute since I have posted any crafty love. Like almost ONE YEAR! Life sure does have a way of moving quicker than one might realize. I have been out of the crafty habit, but my love of paper and all things crafty is still very much alive. I took some time away to focus on my family as we made some major changes in our lives. The time away was needed, but the need to create was equally there. Although I could not create the way I once had, I did use this absence to purge, organize, and enjoy other creatives' artistic endeavors. I am slowly flexing my creative muscles. I feel rusty and sometimes unsure. I even need to remember how to log into my accounts and remember how to post on social media. Ah, another layer to dust off and relearn. I am trying to be patient with myself and my creative practice.
Today, I am sharing a card featuring a few Spellbinders dies, Gnome Hugs, Autumn Wonder, and Notched Corners. Fall should be upon us, but here in the mid-west, it is still in the 90s. Why? I need sweater weather, comfort food, and falling leaves. Well if nature will not cooperate for the moment, then the next best thing is to imagine it.
.jpg)
I love diecutting and this card was definitely a labor of diecutting and inking love. To add depth of shading, I inked each die cut with a coordinating ink. I love the clustering of fall elements around the gnome, it is like the gnome fell into fall. A diecut sentiment from the Wonderful Script Sentiments and a few matte gold pearls completes this card.
.jpg)
Thank you for stopping by! Have a wonderful rest of the week! And don't forget to make something beautiful!
Crafty Hugs,
Keia
Happy Sunday, Fellow Crafty Friends!
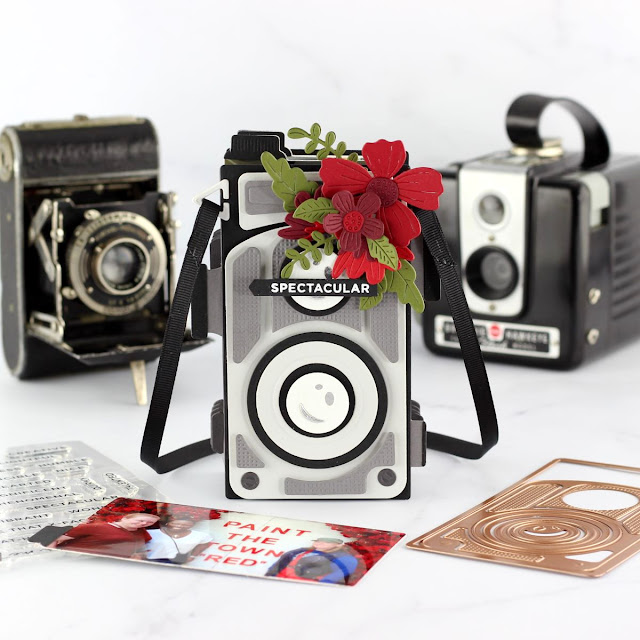
Oh, how I miss you all! A bit of time has passed since my last post. I hope this post finds you well and enjoying the upcoming holiday season. Today, I am sharing with you a 3D card I made using Spellbinders' new 3D Vignette Twin Lens Camera die set.

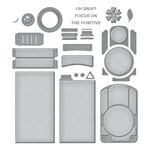
If you cannot already tell, I adore vintage cameras. I now have three in my collection, so this die set is perfect for me. There are roughly 28 dies in this set, but do not let the number overwhelm you. Once you get the hang of how the die pieces work together, the 3D card comes together fairly easily. The hardest part will be choosing your camera's color palette. For this card, I decided to stay with a fairly vintage color scheme because I planned on using the Bold Blooms collection to add a bit of color to the body of the camera with the addition of a floral centerpiece. I cut the pieces of the camera from black, grey, silver, and white cardstock. The bouquet uses a range of red cardstock to create a monochromatic aesthetic. A bit of black ribbon to replicate a camera strap completes this project.

This card is for a dear friend for her birthday. We ladies had a fabulous time together at a local vintage market, and I wanted to honor our time spent together. The 3D camera die set has a die that cuts photos to fit into the body of the camera. I printed several photographs from that day and inserted them into the appropriate slots. I love how this project turned out, and my friend will surely love it, too!
Thank you for spending a bit of your time with me! Have an amazing upcoming week! Until next time...
Happy Crafting,
Keia
Card Supplies:



Hello, Crafty Friends!
Today, we are Celebrating Christmas in July with Spellbinders. This is a fabulous way to be inspired by an array of amazing designers and get you into the holiday spirit. My simple Joy card features Spellbinders Christmas Jasmine and Skinny Stripe Background hot foil stamp.

To create this card, I foiled a black A2 card panel using matte silver foil and the Skinny Stripe Background hot foil stamp. I love the look of the silver foil against the crisp black cardstock. I then used a circle die to create a window for my shaker bits and "Joy" sentiment. However, the real star of this card is the Christmas Jasmine. If you have not seen the floral arrangement videos by Susan Tierney Cockburn, then you are in for a treat. This amazing designer shares her passion for all things floral and provides lovely tutorials on making paper florals come alive. Hint...it involves special tools that help with providing veining for the leaves, and how to mold a paper flower using different ball styluses to create depth and texture to the paper petals. Once I learned the basics of paper floral design, it was time to play with these amazing dies to create 3-D flowers. I just love how they turned out. I completed the card with a few silver beads.
.JPG)
Thank you for joining me. I hope you have a chance to step into your craftroom and create something beautiful!
Happy Crafting,
Keia
Card Supplies:

Tuesday, July 19, 2022
Spellbinders Paper Arts| July Release Crossed Lines Card Front Hot Foil Plate
Hello, Crafty Friends!
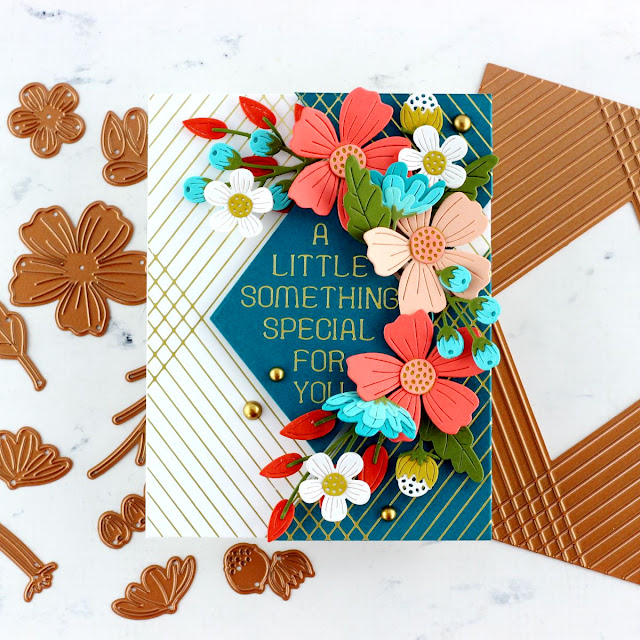
Spellbinders July release is now available! The release is filled with dies and hot foil plates to inspire you to create lovely projects. Today's card features the new Crossed Lines Card Front Hot Foil Plate paired with the previously released Be Bold Blooms floral dies.

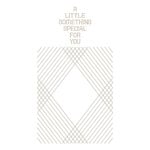
The new Crossed Lines Card Front Hot Foil Plate is the perfect inspiration for my geometric-loving heart. And pairing this gorgeous design with the Be Bold Blooms was sure to produce a stunning design. To create the card, I hot foiled the Crossed Lines Card Front Hot Foil Plate twice, once on teal cardstock and on the wonderful Glimmer Speciality Cardstock, which makes foiling a breeze! I then cut the teal panel along the matte gold foiled lines and layered the colored panel on top of the white foiled panel using foam adhesive tape. With my background panel in place, I used a modern color palette fused with shades of teal, orange, yellow, and a touch of white to create a vibrant floral bouquet. The florals can take a bit of time to diecut and assemble but the end result makes it so worthwhile. A simple hot foiled sentiment, included with the card front plate, completes this card.
.JPG)
For more inspiration, visit the Spellbinders July release (HERE). Thank you for visiting. I hope this card inspires you to create something beautiful.
Happy Crafting,
Keia
Supplies:
Scrapbook.com



Happy Saturday, Crafty Friends!
Today is the release of Spellbinders Stitched Alphabet dies and Stitched Alphabet Descriptors Sentiment stamp. If you are new to stitching on paper, like me, this video is excellent (HERE). I created a bold sentiment with the new dies and then used the Stitched Alphabet Descriptors to tie it together.

To create my card, I first cut a piece of white cardstock down to a mini slimline 3x6 inch panel. I then inked the panel using a mix of rainbow ink colors that coordinated with my color palette. I was a little nervous stitching on paper; however, it was easy to do and wonderfully relaxing after watching the Spellbinder's tutorial. To make sure that the stitching would not rip the paper, I die-cut each letter twice and glued the diecut pieces together. This provided extra support, especially when working the letter "m" where the diecut was susceptible to creasing along the connector points. After stitching on the cardstock, I arranged the letters to spell out the word Smile and added the heat embossed sentiment "You have that x-factor" onto black cardstock for a finishing touch.

Thank you for stopping by and spending a bit of time with me. I hope you have a chance to visit the new May Release from Spellbinders (HERE) and create a little paper magic of your own!
Create Beauty Every Day!
Keia


Social Icons