Sunday, October 31, 2021

Pinkfresh Studio| Monocromatic Garden Roses

Good morning, sweet friends!


Where has the time gone? Can you believe it, we have come to the end of October! Today, I am sharing with you a monochromatic card featuring the Garden Roses collection from Pinkfresh Studio.


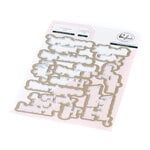
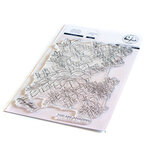
Usually, I am all about glorious color, but this card has been ruminating in my mind for some time now. I came across a fellow designer who had colored a flower in an amazing grayscale palette. I was so taken with the visual appeal of her card, that I wanted to recreate something similar but with a few touches of my own. To create this card, I stamped the Garden Roses image onto a piece of white cardstock and used the Urban Raincoat color palette and coordinating stencils to color in the stamped image. I then diecut the image and laid it aside to work on the card base. Using the Simply Hexagon diecutting plate, I diecut a piece of dark gray cardstock and then popped the pieces back into the frame. I then adhered the diecut panel onto an A2 card base. Using a circle die and Sea Salt cardstock, I diecut a partial circle into the panel. I adhered both panels together using foam tape and then proceed to add inky splatters for more visual interest. I then adhered the floral arrangement over the circular opening. A simple heat embossed sentiment and silver metallic pearls completes this card. 


Thank you for joining me today. I will be back next week for Pinkfresh Studio's November Release. Have a wonderful upcoming week and don't forget to make something beautiful.  


Happy Crafting,


Keia


Friday, October 29, 2021

Scrapbook.com| Slimline Snowflake...HO, HO, HO

 Wahoo!


Happy Friday, sweet friends! We made it! I made it! I am going to take this lap if that is okay? With a youngster at home, e-learning for two weeks, Zoom meetings all week for CASA training, and card projects to create and finish, I am pushing it. However, I am hoping there is a light at the end of the tunnel. Today, I am sharing a card featuring Scrapbook.com's Slimline Snowflake stamp paired with ephemera by P13. 


To create this card, I started by masking an A2 piece of white cardstock and used a palette of green inks to make an ombre background. I then used a deep shade of brown ink to stamp the word HO HO HO. I have had my eye on P13's ephemera pack, so I was excited to use the new Cosy Winter collection to add a little Christmas cheer to my card. A few gold metallic pearls completes this card. 


Thank you for stopping by and spending a little time with me. See you next week. 


Happy Crafting,


Keia 


Supplies:


Wednesday, October 27, 2021

Pinkfresh Studio| Lush Peonies

 Hello, Crafty Friends!


Happy Wednesday. Today I am sharing a card featuring Pinkfresh Studio's Lush Peonies Collection paired with the Diamond Hot Foil Plate.


For the last several weeks my creative time has been limited due to pressing commitments. However, I find creating a wonderful way to unwind and recenter myself, so I am not always inclined to shelve my creativity. The Lush Peonies collection allows me to make beautiful cards in less time. Although I prefer to color with Copic markers, the layering stencils from this collection allow me to add color and shading to my stamped image with ease. And using the Diamond Hot Foil Stamp creates a beautiful letterpress background on my 110 lb. cardstock. A bit of inking and watercolor splatters, along with a simple heat embossed sentiment and butterfly completes this simple, but elegant card. 


Thank you for spending a bit of time with me. I hope you have a chance to step into your creative space and make something beautiful.


Happy Crafting,


Keia 


Saturday, October 23, 2021

Reverse Confetti Stock Your Stash Challenge| Thanksgiving & Friendship

 Hello, Sweet Friends! 


Happy Saturday! Today is my last post as a guest designer with Reverse Confetti. 😔 I have enjoyed my creative time with this amazing craft company. It has been a pleasure to showcase their Fall and Halloween collections. So I thought I would close my last post with a thankful card for the Stock Your Stash monthly challenge


Okay, I cannot get enough of the Autumn Apple Cider stamp and die set. Fall is my favorite time of the year and this set is perfect for creating beautiful autumnal cards. To create this card, I started by inking a piece of white cardstock using inks in a deep red, orange and yellow color palette. I added a few gold inky splatters and put the panel off to the side to dry. I then colored the images from the stamp set using Copic markers and colored pencils. Once the panel was dry, I then used foam adhesive to style my fall elements. The Thanks and Hello Confetti Cuts add the perfect sentiment finishing touch.


Thank you for spending time with me this weekend. Head on over to the Reverse Confetti website for a chance to play along and for more inspiration (HERE). I hope you have a chance to step into your creative space to make something beautiful.


Happy Crafting,


Keia 


Friday, October 22, 2021

Scrapbook.com| Trick or Treat with the new Slimline Spider Web

 Hello, Crafty Friends!


Happy Friday!! Do you have any crafty plans for this weekend? I will be living on a basketball court as my youngest is participating in his first basketball tournament. He is super excited and we are excited for him. So I started my crafty weekend a little early. Today, I am showcasing the new Slimline Spider Web stamp set on an A2 card front.


Okay, this card was a little bit of trial and error. I kind of had a design idea in mind, but my execution was less than smooth. To start, while I liked the idea of the tone-on-tone with the black glitter paper and black embossing powder, I would recommend attaching the glitter paper to a heavy cardstock base and then doing your heat embossing. The paper warped when heat was applied and I spent a bit of time smoothing out the paper. Next, I inked an A2 panel using a contemporary Halloween color palette and then stamped the spider web image. I like the contrast between the scripty lettering and the colorfully stamped panel. To complete this card, I pulled a few fall and Halloween dies from my stash to create a scene. Whew! All done!


Thank you for stopping by. I hope you have a chance to step into your crafty space and create something beautiful!


Happy Crafting,


Keia


Friday, October 15, 2021

Catherine Pooler| Global Adventure... Danke Schon

 Happy Friday, sweet friends!


Today is all about my favorite design elements...GEOMETRIC SHAPES and LUXE colors!! Yes! 


Okay, put saturated color and geometric shapes together and call me a happy crafter! The new Half Circle Background stamp and coordinating cover plate are a blast to play with and creativity is only limited by one's imagination. To create this card, I inked the stamp using the new Luxe color palette onto a 5x7 piece of white cardstock. I then used the cover plate to diecut the panel and was left with a handful of colorful half-circle diecut pieces. Using another piece of white cardstock, I masked a one-inch strip and inked it using a Luxe color palette and added a few black inky splatters. Once dry, I arranged a geometric pattern using the diecut pieces and completed the card by adding a simple sentiment from the World of Sentiments stamp set. 


Thank you for stopping by. I hope this card has inspired you to create something beautiful this weekend.


Happy Crafting,


Keia 


Wednesday, October 13, 2021

Catherine Pooler| Global Adventure

Hello, Crafty Friends!


The new Global Adventure release from Catherine Pooler is available (HERE).  If you were able to catch the Facebook live, then you know that this collection offers amazing stamps, dies, and pattern papers with a folksy, world-traveler feel. And the new inks are sure to be on your wish list. 


To create my card, I used the new We Fit,  nesting dolls, stamp and coordinating die set. I stamped the image onto Copic-friendly cardstock and set aside. I then created a circular mask using masking paper and a circle die. I adhered the low-tack masking paper to an A2 white cardstock panel and used the smaller floral stamps from the set to ink my background. I then Copic colored a few of the leaves and added Dandelion Nuvo Drops to the berries. Once dry, I colored my two images and adhered them to the card base with foam adhesive. A simple sentiment completes this card. 


Thank you for stopping by. I hope you have a chance to pop over to the Catherine Pooler blog (HERE) For more amazing inspiration. 


Happy Crafting,


Keia