Tuesday, September 28, 2021

Scrapbook.com| Pops of Positivity

 Happy Tuesday, Friends!


I am sharing the news that Scrapbook.com's Gallery is launching today and it is better than ever! The newly revamped gallery makes it easier to upload, share, comment, and link products to your online projects! Send an emoji, leave a comment, or save a post, but more importantly, there is an abundance of inspiration to love and right at your fingertips!


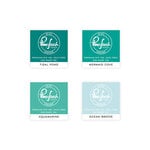
As part of the celebration, I created this card featuring the Pops of Color. First, this card was inspired by an amazing artist I came across on Instagram, Josie Lewis. She makes the most gorgeous, colorfully chunky art that is a visual feast for the eyes. Seriously! No joke! You can find Josie's website (HERE ) and Instagram (HERE). Although I do not share Josie's flick of the wrist technique for layering, not to mention the same medium, I was interested in seeing if the Pops of Color could be used in a similar creative fashion. While not the same, I am happy with the results. 


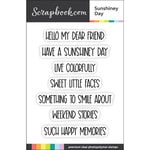
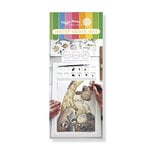
To create this card, I started by using Mint Tape to mask off a triangular area. I then applied the Pops of Color, in rainbow order, to an A2 sized piece of mixed media paper. I colored the fun dog image from the Wish Happiness stamp set from Colorado Craft Company and added a few more bits from the I Work for Watercolors set from Picket Fence Studios. A simple heat embossed sentiment completes this card. 


Thank you for stopping by. You can see this card and other card creations in my gallery (HERE). Please visit the newly revamped Scrapbook.com gallery for more creative inspiration. 


Happy Crafting 


Keia 


Card Supplies: 


Pinkfresh Studio September Release Instagram Hop| Stamp, Die, Stencil and Hot Foil Stamp

 Happy Tuesday, Crafty Friends!


I am here to celebrate Pinkfresh Studio's September Release! Today's card features the new Dahlia Bunch stamp and coordinating die


I enjoyed coloring this beautiful floral bunch. The coloring on this dahlia bunch is known as Cafe' Au Lait. With fall in the air, although it is still 90 degrees, I wanted to celebrate the beautiful rich color palette of fall. I love how this card turned out with its shades of brown and subtle yellows. I stamped the Dahlia Bunch image onto Copic-friendly paper. After coloring, I added a bit of white inky splatters and set the coloring aside to dry. I then did a partial diecut on a white A2 panel and inked it with Gathered Twigs, Warm Bluff, and Doe. I used foam adhesive to adhere the two panels together. To add a bit of texture to the rich brown panel, I dry embossed a hexagon pattern using the Simply Hexagons Cover Plate. A few brown prill beads and heat embossed sentiment completes this card. 


Please joining the Pinkfresh Studio Creative Team and friends for an Instagram Hop (HERE). As with every release, Pinkfresh Studio is looking to share the love. The ENTIRE release will be gifted to one lucky creative on Pinkfresh Studio Instagram post. And ten (10) lucky creatives will have a chance to win $25 gift certificates along the hop! This is crafty fun you won't want to miss. Visit the Instagram Hop (HERE)!


Happy Hopping!


Monday, September 27, 2021

Pinkfresh Studio September Challenge| Greenery and Leaves

Happy Monday, Crafty Friends!


I hope you had a wonderful fall weekend! I had a chance to pop into my craftroom and have a little fun creating this card. The monthly Pinkfresh Studio Challenge is quickly coming to an end. You have today and tomorrow to share your project and we would love to see it!


I decided to keep this card aesthetically simple with a touch of color. The Floral Vase collection includes stamps, stencils, and coordinating dies, which make creating fun and easy. To create this card, I started by stamping the image onto Copic-friendly cardstock and letting this dry. I then worked on the stencil oval background shading using Sky Blue, Slumber, and Stargazer dye inks.  I love coloring, so I chose Copic marker colors that were close to this month's color palette Stargazer, Apricot, Ballet Slipper, Lemon Whip, and Meadow. A simple sentiment from the stamp set and Sapphire jewels completes this card. 


(Note: stretch your dies by turning them into stencils using masking tape/paper or Post-It notes. Once you diecut the shape, use the mask to add the shape to your card base using inks and other mediums).


As with each challenge, Pinkfresh Studio is looking to share the love. One (1) lucky creative will win a $50 gift certificate to Pinkfresh Studio's online store. Remember, the challenge ends tomorrow! For more details, check out the challenge post (HERE). 


Good Luck and Happy Crafting!


Keia


Saturday, September 25, 2021

Scrapbook.com Slimline Christmas Foliage| FA LA LA....

 Happy Saturday, Crafty Friends!


Today, I am sharing Scrapbook.com's new stamp Christmas Foliage. If you are still loving this slimline size, then this latest release of stamps is just for you. 


Did you know there are 91 days until Christmas? I am a mom of young boys, so this is important information to know and in a timely manner! And I need to get a jump on my Christmas cards. Glad I have one down. 😆 Who is with me? How many Christmas cards have you completed? Okay, so you can see why I am a little excited that I have at least one. And creating this card was fairly easy once I had a design in mind. To start, I used the Slimline Nested Rectangles for the card's foundation and inked this with Evergreen, Olive, and Fresh Pear dye inks. Once the panel was dry, I die cut a small rectangular piece for the FA LA LA center. I then heat embossed both pieces using the Slimline Christmas Foliage stamp and gold embossing powder, the center for the sentiment, and the larger panel with the foliage pattern. I used Pinkfresh Studio's Poinsettia Christmas Washi Tape and coordinating dies to build my floral bouquet. A few leaves and metallic gold pearls completes this festive and beautiful card. 


Thank you for sharing a part of your weekend with me. I hope this card has inspired you to start working on your Christmas cards. And if you are already ahead of the game, wonderful! Then I hope you have a chance to step into your creative space and make something beautiful.


Happy Crafting,


Keia 


Card Supplies:


Wednesday, September 22, 2021

Reverse Confetti| Anything Goes

Happy Wednesday, Crafty Friends!


Today, I am sharing with you an Anything Goes post/challenge. Sometimes we need to throw caution to the wind and just create. Pull out your favorite pieces of cardstock, stamps, dies, and stencils and let's have some fun. 


Coloring is one of my favorite techniques, but sometimes it's fun to just play with cardstock and a new die. To create this card, I selected a modern geometric design and color palette. I used the Reverse Confetti Circle of Waves Confetti Cut and diecut several circles from my chosen color palette. I then layered these onto a circle backer using foam tape to add varying levels of dimension. The duo A2 panel uses two colors adhered using foam tape and then diecut to create a circular window. A simple "Thanks" from the Thanks and Hello die set and clear pearls completes this card. 


Thank you for joining me today. I hope you have a chance to step into your creative space and make something beautiful.


Happy Crafting,


Keia 


Supplies


Saturday, September 18, 2021

Scrapbook.com| Acetate Fun!

 Happy Saturday, Crafty Friend!


Today, I am having a little fun with Scrapbook.com's Acetate Cardstock. So grab your favorite beverage and join me for a quick post. 😉


Scrapbook.com introduced their own brand of heat-resistant acetate for cardmaking and scrapbooking. This acetate can be used in a variety of creative ways. Fellow Creative Team Member, Jaime Pate, shows how to use acetate cardstock with her Minc Machine (HERE). Tiffany, Creative Team Member, shows how to use ink sprays for a little mixed media fun (HERE). The possibilities for this craft room staple is only limited by your imagination. 


I created a card with a faux stain-glass effect. To design this card, I stamped the Miss Your Smile image onto acetate cardstock with VersaMark ink and heat-embossed the image with black embossing powder.  I then stenciled the image onto an A2 piece of white cardstock in a teal color palette and adhered to an A2 top-folding card base. I wanted to frame this beautiful flower, so using the Hero Arts Infinity Nesting Rectangle dies to create a window. I adhered the embossed acetate to the back of the window panel and aligned the two images, embossed and stenciled. A simple 'Hello' sentiment completes this card. 


Thank you for spending time with me today. I hope you have a chance to make something beautiful this weekend. 


Happy Crafting,


Keia 


Card Supplies:


Thursday, September 16, 2021

Reverse Confetti Stock Your Stash| Halloween and Fall Fun

Happy Thursday, Crafty Friends!

Come join us for the Stock Your Stash monthly card making challenge with Reverse Confetti. This month we are continuing the fun from the new release with a focus on Halloween and/or Fall Fun (HERE).


 I love fall, so creating a fun fall card was perfect. To create this card, I used the newly released Autumn Apple Cider stamp and coordinating die. I enjoy stretching my supplies, so I used the stamp's images to create a background for my A2 top-folding card base. I then used the same elements to create a fall scene and added the beautiful script "Hello" die. A few gold metallic pearls completes this card. 


The Stock Your Stash Challenge is open until September 29th at noon CST. Don't forget to link your card so we can see your fabulous project. In addition, Reverse Confetti is gifting one (1) lucky winner a $20 gift card to their online store! For more details, visit the September Stock Your Stash Challenge (HERE). 


Happy Crafting!


Keia 


Card Supplies: 


Wednesday, September 15, 2021

Waffle Flower and Pinkfresh Studio Instagram Hop| Thank You

 Happy Wednesday, Crafty Friends!


Today, Pinkfresh Studio and Waffle Flower are hosting an Instagram Hop to showcase their amazing stencils, water media mat, new stenciling mats, and coordinating brush holders. Come join us for a little creative fun!


Okay, when I am in the craft zone my craft space shrinks from its normal 6 feet space to a mere 12x12 space. And then the next thing I know, I need to clear space so that I can ink a background, do stenciling work or add a few watercolor splatters. Yeah, this is not going to work. Introducing the water media mat from Waffle Flower. Now, the water media mat from Waffle Flower has been out for a little over a year; however, the mat is new to me (VIDEO HERE). The water media mat is perfect for clearing a clean space so that I can do a technique or two without clearing my entire workspace. The water media mat has a place to fit a 9x12 sheet of watercolor paper, or other paper medium. There is also a spot to hold your watercolors, including smooshing your mini-inks into the square tray. One of the downsides is that this mat does stain. The mat is meant to be used, so if a stained mat would drive you crazy then this might not be ideal for you. 


To create my card, I started by using Waffle Flower's Big Dots stencil to create a rainbow of color. I then applied glitter paste on top to add a little sparkle. While the panel was drying, I diecut the word THANK using Heather's Uppercase Alphas from white and colored cardstock for the outlines. The word You is diecut from Pinkfresh Studio's Phrase Builder: You dies. I then layered my sentiment onto the rainbow panel and adhered this to an A2 top folding card base. And my rainbow THANK You card is complete. Simple but pretty. 


If you love stenciling, then head over to Waffle Flower's Instagram page (HERE) for a chance to win their entire release. In addition, Pinkfresh Studio (HERE) is also gifting one lucky creative with a $25 gift certificate to each store!! For full details and more stencil inspiration, head over to Instagram!! You will be glad you did!


Happy Crafting!


Keia 


Card Supplies: