Happy Friday, Crafty Friends!
We made it to the weekend! This Friday wraps up my last post as a guest designer with Concord & 9th for their January release. I enjoyed flexing my creative muscles and playing with their fun stamps and dies from the All You Need Is Love collection. Today, I am showcasing the Color Me Happy and the Mini Gift Box bundles.
Okay, there is a whole lot to love about these two bundles, and both of these center around my boys, but can be used for many creative endeavors. Can we talk about the Color Me Happy bundle? I am loving the Crayon diecuts, which are perfect for creating cards for the educator in your life, crafty peeps, kiddos, I mean the list goes on and on...
I used the Color Me Happy set as a Valentine's Day card for my hubby. I have had the City Stacks stamp/die in my craft stash for awhile and when I saw the Color Me Happy bundle I knew I wanted to pair the two sets together.
To create this card, I stamped and diecut the cityscape from the City Stacks stamp set. I then used Honeysuckle, Ballet Slipper, Sorbet, Grapefruit, Stardust, Buttercup, Sprout, Parsley, Aqua Sky, and Oceanside to create a rainbow of color on the city skyline. I heat embossed the sentiment "You Bring So Much Color To My World' on the front of the panel. I then used my rainbow color palette to do a little ink smooshing where I would place my Crayons. I diecut my Crayons from the coordinating cardstock in the same rainbow palette. Once I had all my pieces, I adhered the diecuts and panel to a top folding A2 card base. This completes my card.
The Mini Gift Box bundle pairs perfectly with any of the stamps and dies from the All You Need Is Love collection. You can use the gift box to hold a min-set of Valentine's Day cards, a trinket, or in my case, CANDY! On a side note, my boys were itching for me to finish my projects so they could enjoy a few chocolatey treats. Once I gave the all-clear, it was over. Treats enjoyed.
I decided to create a trio of gift boxes for my last project from heat embossed vellum, abstract inked hearts, to a Scattered Hearts Turnabout peek-a-boo box. There are so many wonderful ways to use the Mini Gift Box set, so just have fun and see where your creativity takes you. You can find a video (HERE) for more inspiration.
Thank you for visiting. For more inspiration, don't forget to visit the Concord & 9th blog (Here). Until next time...
Happy Crafting,
Keia
Hello, Crafty Friends!
Today I am popping in to share a card featuring Pinkfresh Studio's Floral Notes stamp, stencil, and coordinating die. The card is inspired by Pinkfresh Studio's August 2020 Challenge...Florals. Honestly, I have had my eye on the Floral Notes stamp set for a while and I was excited to finally break it out of my stash pile to play with it. Please tell me I am not the only one who collects stamps for some playtime in the future, right? Wink. Wink.
Lately, I have been seeing this amazing mix of black and white paired with bold color and I am loving the juxtaposition between the two color groups. I wanted to play with this concept, but with one addition, I am all about framing. However, I didn't want to necessarily add a physical frame to my card project. Been there and done that this week. My design was to use a rectangle die to create a mask for the area I wanted to frame-out. This is the perfect time to have your craft shape dies do extra duty by creating masks. I created my mask using acetate for longevity; however, in a pinch, I have used paper. Remember to save both the positive and negative for later use. The Essentials Stitched Rectangles had the right-sized rectangle for this card.
Once my mask was complete, I stamped the Floral Notes image in Detail Black ink onto a white, A2 top-folding card base. I then used the rectangular mask to create the base for my focal point. I inked the area using Emerald City dye ink. I was mindful to concentrate the color toward the bottom of the card and then let the color fade as I moved to the top of the card. I few inky splatters add another layer of interest.
The Floral Notes set is perfect for a slimline card; however, do not let the size of the stamp fool you into thinking it cannot be used on smaller card projects. I used the layering stencils to create the look of a no-line colored floral bouquet using Meadow, Sparkle Rose, Raspberry Bliss, Bubble Gum, and Ballet Slipper dye inks. Once finished, I fussy cut various pieces of the bouquet into manageable shapes for my card front. Using my favorite crafty product, foam adhesive, I went about layering the diecuts. A stamped sentiment and a few pale pink jewels complete this card. I just love how it turned out!
I hope this card has inspired you to step into your craft space and play with colors to create a little paper magic. There is still time to participate in Pinkfresh Studio's January Challenge...A Year in Review. And challenge participants have a chance to win a $50 gift card to Pinkfresh Studio's online shop. For more details, visit the Pinkfresh Studio Challenge (HERE). Thank you for stopping by!
Happy Crafting,
Keia
Happy Sunday, Crafty Friends!
Today is my birthday! Wahoo! Another year older and feeling great. Every birthday I enjoy spending a little crafty time in my studio space. I love breaking out some of my favorite products, lighting a candle, turning on classic music, and just enjoying a moment of creative peace. Time to craft!
Today's card features Pinkfresh Studio's Nested Chevron die, Sending Love and Hugs stamp/die set, Leafy Branch die, and Diagonal Stitched Rectangles. To create this card, I used the Nested Chevron die in two different ways, one to dry emboss the white A2 panel and as the diecut pieces for my inked chevron pattern, which uses Mint, Coral Reef, Lemon Whip, and Peach Fuzz dye inks. The Sending Love stamp is inked with Passion Fruit, Coral Reef, and Meadow ink. Once I had my pieces ready, I layered the inked chevron pieces, adhered the diagonal stitched frame, leafy branch diecut, and added my floral bouquet with a diecut and inked sentiment to my A2 card base. A few pale yellow jewels complete this card.
Thank you for stopping by and sharing a bit of your day with me. I hope I have inspired you to spend a little time in your craft room to create a little paper magic.
Happy Crafting,
Keia
Happy Friday, Crafty Friends!
We made it and now it is time to get a little crafty this weekend! Today, I am sharing two cards featuring the new All the Love bundle and Scattered Hearts Turnabout from Concord & 9th.
Okay, the Scattered Hearts Turnabout paired with the love "Love" die from the All the Love bundle has stolen my heart. I mean seriously, what is there not to love? With the stitching, the large size of the letters, mixed with the ability to create your own pattern paper, a creative's heart is ready to get inking. To create this card, I inked the Scattered Hearts Turnabout once for the base layer seen on the A2 card base, and all four times in different colors for the pattered hearts. Once I had my heart pattern paper, I diecut the paper using the heart die. I diecut the word Love three times for added dimension and cut it apart. Once cut, I inked the bottom of each letter with Ballet Slipper die ink. The Love You solid heart is perfect for mixing colors on the same stamp for an abstract look. Now that I had my pieces ready, I slowly built up my layered card and add the You, diecut from Sorbet cardstock, to complete this fun take on using the Scattered Turnabout stamp in multiple ways.
I love typography. I am a fan of mixing letterforms to create interesting graphics. So my heart was content when I had a chance to play with the various typeface stamps from the All the Love stamp and die set.
To create this card, I played with the stamps until I had a design that aesthetically worked for me. Once I have my design, I went about inking the stamps in the contemporary Valentine's color palette of Honeysuckle, Ballet Slipper, Sea Glass, Aqua, and Oceanside. A vellum and Cranberry cardstock heart with the sentiment "Love You" completes this card.
Thank you for spending a portion of your day with me. I hope these card projects have inspired you to create a little paper magic in your own crafty space. For more information on the products used and inspiration, visit the Concord & 9th website (HERE).
Happy Crafting,
Keia
Hello, Crafty Friends!
I am popping in to share a quick card using Pinkfresh Studio's Make A Wish stamp and die set paired with the Mirrored Triangles stencil.
I enjoy the cardmaking process. However, sometimes it is nice to be able to create an impactful card without having spent two hours. This card is fun and is a breeze to make once you get the hang of how to use the Mirrored Triangle stencil. For a wonderful tutorial on how to use multiple colors on this stencil, in addition to flipping it to achieve another level of color and pattern, check out this video (HERE). Once I had my background, it was fun stamping my layered chocolate cake. A simple Happy Birthday sentiment from the set completes this card.
Thank you for spending a portion of your day with me. I hope this card inspires you to head into your craft room and create a little paper magic.
Happy Crafting,
Keia
Hello, Crafty Friends!
Today, I am sharing a card featuring the Layered Sunburst Stencil from Pinkfresh Studio paired with Heather's Lowercase and Lea's Ornate Uppercase alphabet and the Keep Going stamp and die set.
The Keep Going stamp set has several encouraging sentiments. I chose to pair the sentiment "Wishing you strength for today and hope for tomorrow" with the word HOPE. A perfect word for the time we find ourselves in as a nation. We could all use a little hope as we reach out to support each other and our communities. Lately, I have been trying to work on my no-line Copic coloring skills and the beautiful flower from the Keep Going stamp set was a perfect chance to practice. Instead of using grey ink, I decided to try Distress Ink Antique Linen. I think it worked well with the yellow flowers. Once I completed coloring my floral bouquet, I added the Leafy Branch as a final layering touch.
Okay, the Layered Sunburst Stencil is awesome! This stencil can be used with different mediums to really kick your creativity into high gear. I recommend you check out this video from fellow DT member, Erica A-B, for more creative options. I decided to use a rainbow color palette and I love how well it pairs with the rest of my card's elements.
Thank you for stopping by. I hope you have a chance to create a little paper magic this week.
Happy Crafting,
Keia
Happy Tuesday, Crafty Friends!
Today, I am sharing cards using Diamond Press's Lovely Floral cover plates. This collection features four floral cover plates and is perfect for making quick, elegant cards. Or, pair the cover plates with one of your favorite techniques to take your cardmaking to the next level.
For this card, I used masking stencils to create a twilight effect using dye inks in beautiful shades of deep purple, blue, orange, and pink. I diecut the silhouette image three times to add dimension without having to use foam adhesive on the delicate stems. A simple heat embossed sentiment completes this card.
Another fun technique is to use alcohol inks to create an organic background for your diecut.
Using alcohol inks creates a sense of movement. When using alcohol inks, be sure to work in a well-ventilated area. I like to use Tim Holtz's Alcohol Ink Blower to move the alcohol inks around on my yupo paper. To create this card, I used some of my favorite colors Sunset Orange, Lettuce, and Sunshine Yellow. A simple sentiment diecut from gold mirrored cardstock adds the finishing touch.
I hope these projects have inspired you to try a few new techniques with your cover plates. Thank you for stopping by.
Happy Crafting!
Keia
Happy Monday, Crafty Friends.
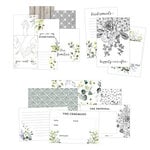
I hope you had a wonderful week and were able to spend a little time in your craft room. Today, I am sharing a card featuring Scrapbook.com's Wedding journaling cards. This set of journaling cards is what I would consider rustic elegance. The set of 42 cards features lovely florals in shades of lush greens and deep purples paired with weathered shiplap and distressed wood. While I have been married to my love for close to 20 years, so I am not in need of wedding journaling cards for scrapbooking; nevertheless, I enjoyed using these cards to create a beautiful floral card to give to my sweetheart for Valentine's Day.
To create this card, I used one of the woodgrain 4x6 and 3x4 floral journaling cards as the foundation for my card. I added a few inky splatters to my 4x6 card to complete the weathered look before adding the panel to a top-folding card base. The focal point of the card uses the 3x4 journaling card paired with Altenew's Hibiscus Garden 3D dies, Pinkfresh Studio's Leafy Branch, and the word "love" diecut from Scrapbook.com's Inspirational Life Sentiment die collection. Scrapbook.com's smooth cardstock from the Floral, Boho, and Cools collections complemented the colors in the Wedding journaling cards perfectly. A few crystal drops completes this card.
Journaling cards are a great addition to a cardmaker's creative toolbox. I hope this has inspired you to use journaling cards in your cardmaking designs. Thank you for stopping by.
Happy Crafting,
Keia
Card Supplies
Happy Friday, Crafty Friends!
I am so excited to be a part of Concord & 9th's January release. It is time to pack away the snowflakes and tinsel and time to break out the hearts! The new release is too cute and I am looking forward to sharing with you two cards I created using the Be Mine and Sweet Talk bundles.
The design for my You're My Jam card started by taking a piece of white cardstock to create an A2 top-folding card. I then used Cranberry, Poppy, Honeysuckle, and Ballet Slipper dye inks to ink the rectangle shape from the Painted Shapes stamp set. This is one of my absolute favorite stamps for creating awesome abstract elements. I added a few inky splatters to complete the abstract look. Using the panel die from the Be Mine die set, I created my background by repeating the jam jar image from the Be Mine stamp set. I then colored two jam jars using Copic Markers. A simple heat embossed sentiment completes this card.
My second card features the Sweet Talk stamp set.
I really wanted to highlight the beauty of the ornate floral heart. To create my card, I started by inking a piece of white cardstock using Cranberry, Poppy, Honeysuckle, and Ballet Slipper inks. I then used Versamark, gold embossing powder, and my MISTI to create a background pattern using the ornate floral heart. To complete this card, I heat embossed a sentiment from the set onto vellum paper. A simple, but elegant card for the upcoming Valentine's Day season.
Thank you for stopping by. Please take a moment to visit the Concord & 9th Blog for more inspiration from the January release.
Happing Crafting,
Keia
Happy Tuesday Crafty Friends,
Today, I am sharing a card featuring the new Wave stencil from Scrapbook.com. Stencils are a very versatile tool in a crafter's toolbox and can be used in a variety of ways.
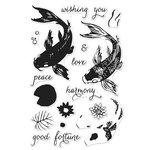
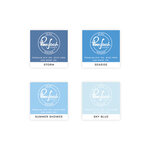
To create this card, I started by inking a piece of Sugar Cube cardstock using Sky Blue, Summer Shower, Seaside, and Storm dye inks from Pinkfresh Studio. The Hero Arts Layering Koi Fish was stamped in a pale grey and Peach Fuzz inks. I appreciate the look of no-line coloring with Copic markers and try to utilize opportunities to practice this skill. As I am a newbie, it took me about two hours to color the beautiful flowers from Altenew's Pin Sketched Flowers stamp and die set. Many crafters use either a pale grey ink or Antique Linen Distress Ink for this technique. I used my Polychromo colored pencils to apply additional shading to the leaves and petals. I find it is best to let the ink dry on the card panel before applying white embossing powder. Allowing the panel to dry lowers the chances of the color bleeding through and discoloring the embossed area. By applying embossed ink in a more random pattern, provides a sense of movement to the card panel. A sentiment and a few clear dots to mimic air bubbles completes this card.
Thank you for stopping by. Have a wonderful rest of the week.
Happy Crafting,
Keia
Card Supplies:
Hello Friends,
As a nation, I am saddened by the state we find ourselves in. And the reality is that it will take us time to heal. Right now, I do not have the words to express all the emotions that I am feeling. However, I find myself seeking a moment of quiet for reflection and pondering how to move forward.
Today, I am sharing a card I made offering a "Paper Hug." I think we could use one right about now.
Making this card is a great way to use those scraps of paper we have in our craft rooms that we cannot let go of but are taking up precious real estate. To create this card, I took a piece of Sugar Cube cardstock and covered it with strips of Guava, Pink Champagne, Cookie Monster, and Pablano cardstock. I then Used the Collegiate Letters to diecut the word "Hug" from the panel. Using a We 'R Memory Keeps geometric 3D embossing folder, I added a little visual interest to the background panel. A heat embossed sentiment on vellum and a few paper airplanes complete this card.
There is a lot of work that needs to be done in the days and months ahead. Remember to pace yourself. Self-care is important, so set time limits for screen time, rest, listen, and lean into your communities. I am sending hugs to all my friends in the crafting community.
Hugs,
Keia
Card Supplies:
Cardstock: TE (Guava, Pink Champagne, Cookie, Pablano, vellum)
Dies: Diamond Press (Collegiate Letters)
Stamps: Lawn Fawn (Sending Letters), Diamond Press (Flower Garden)
Accessories: Copic Markers, VersaMark, black embossing powder,
Hello friends,
Today, I am popping in with a quick and fun card using Diamond Press's Collegiate Letters.
I don't know about you, but I seem to be collecting alphabet dies like they are the next big crafty thing. I have them in a range of sizes and fonts, which can make for endless creative possibilities. I like the bold look of the Collegiate Letters, and the die is large enough to really be the focal point on a card. This card is actually a 5x7. To create this card, I first started by using Concord and 9th's Pained Shapes stamp set and inking this abstract heart with Berrylicious, Passion Fruit, and Coral Reef dye inks from Pinkfresh Studio. I used the tiny brushstrokes stamp and heat embossed the image with gold embossing powder. Once I had my panel the way I wanted, I used the L, O, V, E dies, and diecut each from the inked panel. I then went back and diecut each of the letters twice to add dimension to the card panel. I inserted the letters back into the card panel to complete the eclipsed look. A simple "you" diecut from black and gold glitter cardstock is affixed to the center, and this card is a wrap!
Thank you for stopping by! I hope you have a chance to step into your craft room and create a little paper magic this week.
Happy Crafting,
Keia
Supplies:
Cardstock: TE (Sugar Cube)
Dies: Diamond Press on HSN (Collegiate Letters)











Social Icons